Posts

Microscope Eyepieces

Image
New telescopes and microscopes always seem to ship with almost useless eyepieces.  The crazy thing about this is that both microscopes and telescopes are far more enjoyable to use if you have decent and large eyepieces.  You'd think that new products would ship with accessories that make the product enjoyable to use so a new user isn't discouraged or turned off to the hobby but it seems the manufacturers are more focused on spending as little as possible.  The tiny eyepieces that ship with most microscopes and telescopes do not make the new product enjoyable to use... not at all...  and I've seen many beginners stop the hobby because of this.  This means they didn't spend any money on future accessories too which hurts the manufacturers. I, however, prefer to improve anything I own.  I care for everything I own, properly store everything, and properly maintain everything.  I don't even like seeing fingerprints on my stuff! I had already replaced some of my objective
Tulips for the Playhouse

Image
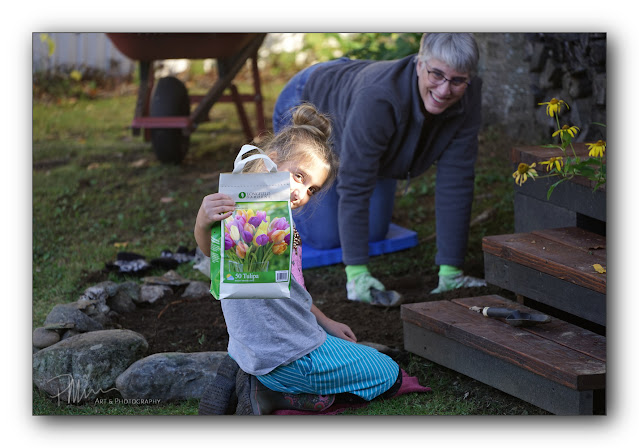
Will and Sue gave us a big bag of tulip bulbs a few months ago.  Sheila and I had been trying to find a home for them in one of our flowerbeds and finally decided to plant them around the playhouse.  This meant I had to find enough rocks to use as a border for two new flowerbeds.  I quickly found the necessary rocks and dug two new flowerbeds, one on each side of the path to the playhouse. Kenzie came over and helped Gee plant all the bulbs about a month ago... After Kenzie and Gee planted the bulbs, I went out there with chicken wire to cover the flowerbeds to keep our local rodents from stealing the bulbs.  I then covered the chicken wire with a mix of more potting soil and top soil.  We've had bulbs stolen by rodents before so hopefully this chicken wire will deter them this time. We'll see how these tulips do in the spring.  They should look very nice flanking each side of the steps to the playhouse.  

Another Homemade Solar Filter

Image
Back a year or so ago, I built a wood frame solar filter for one of my larger telescopes and, if interested, you can  read about it here.   This is another blog entry about a new homemade solar filter that I made about a month ago to be used, mostly, for testing purposes but it never hurts to have multiple ways to view the sky, daytime or nighttime.   I decided to build this solar filter for two reasons.... 1) I already had the supplies so it wouldn't cost me anything, and, 2) I want to compare one of my Spectrum glass solar filters to this new solar film filter I made as well as compare it to my solar wedge as a comparison between the three types of solar filters.   To make this comparison as accurate as possible and to keep as many scientific controls as possible in this little test, I decided that I should use the same telescope and the same camera so the only significant variable in this test would be the filter itself.  My small Skywatcher ED 72mm refractor was the best option

Variable Weather

Image
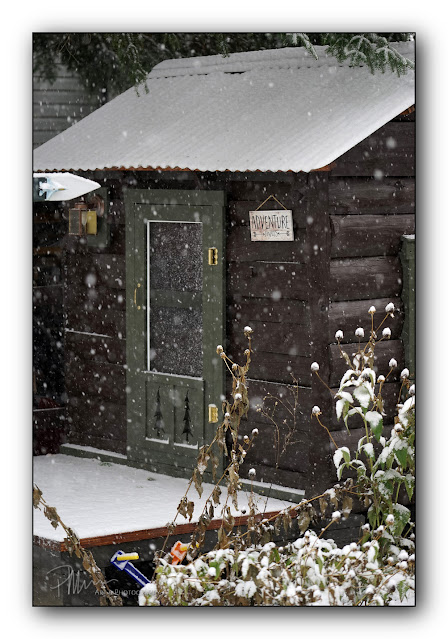
No matter where I have lived across the country, the weather has always been known to change wildly within a day or even hours.  Even though it is not so uncommon, it is worth mentioning when it does occur.   Last week started out a bit on the cold side which was really average temperatures for this time of year.  Then, on Monday, we had a little bit of a snowstorm that dumped about eight inches of wet, heavy snow on us.   I didn't bother trying to start the snowblower since we have not been leaving the house anyway but I did need to rake the roof and do some shoveling.  The snow was deep and it was heavy so it was a necessity to remove it from the roof.  I knew that it would only get heavier as it melted on the roof and eight inches of snow is a lot of snow.   I wasn't too thrilled about needing to rake the roof so early in the season.  Even a healthy person wouldn't be too thrilled about needing to rake the roof but my spinal injuries take a big hit whenever I need to mov

Nothing Much Getting Accomplished Lately

I haven't written here in quite a while because I simply have not had the energy to accomplish anything including even writing a simple blog entry.  I assume my main problem is that I am still fighting off this virus that has been coming and going since May.  January to May was miserable with a solid fever for four months, breathing difficulties, sore throat, congestion, vision problems, cognitive difficulties, and absurd levels of fatigue.  These symptoms have been coming and going in waves since the fever broke in May. I'd say my biggest complaint is the viral fatigue.  The fatigue from my mast cell illness is debilitating and what I would call "overwhelming" at times but this fatigue due to this virus is far worse.  Just standing for any amount of time is too much to do.  I don't even have the energy to simply stand long enough to stop and say just a short sentence to Sheila.  I need to sit down.  By the time I get cleaned up and brush my teeth first thing in t

Smaller Solar Filter for Smaller Telescope

Image
Until recently, I've been using my usual photography-based cameras for my astrophotography.  I'm not going to get into details here but using those everyday cameras is not ideal for most astrophotography (it's okay for some things but not ideal for most) so I purchased two astronomy cameras.  One camera captures high speed video in color and the other camera captures high speed video in monochrome.  Capturing video provides me with many frames to stack as images in a very short period of time.  Stacking the images provides a lot of benefits including less noise, more details and cumulative exposure.  With these cameras and a fast computer, I can capture hundreds of video frames (which are images) in just a few short seconds.  And that is at 6mp.  Many low end astronomy cameras are less than HD resolution, one or two are at Full HD resolution and my cameras happen to capture larger images at 6mp so I'm happy with that too.     I have two Sony cameras that I use for my ev

Lukey's New Steam Locomotive

Image
We gave Lukey a new steam locomotive for his birthday.  When he first drove it on his layout, the locomotive would slip and slip and slip.  If it was pulling any cars whatsoever, it would lose traction and stall while the wheels would continue to spin.  After cleaning the track...  and cleaning the wheels of the locomotive...  we determined that we needed to add something to the wheels to help add traction.  This is when I decided to give Bullfrog Snot a try so I placed an order online.   The Bullfrog Snot arrived within days but today was the first chance that Lukey and I had to apply this new sticky green stuff. We place the locomotive upside-down and cradled in a towel and applied some power to the wheels so they would turn.  Then we cleaned the wheels again so the Bullfrog Snot would stick to the wheels as best as possible and then started applying this sticky green goo called Bullfrog Snot. We let it run for about a half hour, ups

Lukey's Astrophotography

Image
This morning, the sun was shining brightly and the sky was cloudless with good visibility so I asked Lukey if he wanted to look at the sun for a little while.  After we set up the telescope and all the associated gear for solar astronomy, we found the sun in the telescope.  We talked a little bit about sunspots, what they are and why there are none visible today.  I explained that we're in the middle of the 11 year solar cycle which is the long period of relatively little activity on the sun.   Since there wasn't much to look at and discuss, we then we swapped out the eyepiece for one of my cameras so Lukey could shoot a few photos... Lukey picked up the remote shutter release and shot his first astrophotography images... He shot just two photos but they came out very nicely!   They were both the same so I'm only sharing one of them here.   The seeing was good this particular morning so we were able to capture some faint hints of the convection cells bubbling to the surface

New Home Office Completed

Image
Sheila now has a completed new home office! I've been working on the room and building a desk over the past two or three weeks.  The long wall of the room had significant water damage so fixing that was my first task.  My plan has been to remove half of that wall, install a beam, and open it up to a desk area of all windows that juts out into our yard. Until now, I hadn't repaired any of the water damage so that was the top priority.  The need for a home office presented itself so the wall needed to be repaired at least temporarily.   I spackled the damaged wall...  three coats...  then two coats of paint...  then trimmed out the windows which were never trimmed when installed (windows were installed by the previous homeowner many years ago)...  added some crown molding...  then started working on the desk. If you've been following this blog, then you know that we had originally ordered a desk online.  A few days after placing the order, we were notified that the desk was b

Weather Not Cooperating

Image
Sheila and I are in the process of moving her workstation from our kitchen table to her own home office in what used to be referred to as our 'train room'.  The trains are all on shelves now and the room has been cleared of clutter in preparation of Sheila's new desk and office. The legs and supports for the new desk. Sheila received word that she'll be working from home for the foreseeable future so we figured it was time to move her out of the kitchen and into her own working space.  Converting a room to a home office was quite an undertaking since we are still in the process of renovating the house little by little and this is a very small house with no 'extra room'.  Making a clean spot is like a giant tile game of sliding numbered tiles one space at a time to free up space elsewhere on the board.  That is what we had to do to make a clean spot for Sheila and my spine is in no condition to do things like this anymore! The process of designing and building he