Posts

Showing posts with the label christmas present

Power Feeds

Image
(As I wrote in my previous blog post, I'm experiencing some lousy health tonight. From past experience, I know I will be in and out of the bathroom for a significant amount of time through the night tonight so that gives me some time to write between the waves of nausea, dizziness, lightheadedness, and all the other 'fun' symptoms.) Power feed panel with simple banana jacks. This little layout is sitting on the floor on top of a plastic drop cloth which is what you are seeing covered in all that messy brown paint. I've finished preparing power feeds for Lukey's new train layout (one of his Christmas presents this year). Making the power feeds themselves was a piece of cake. Actually, it was so easy, I'm not sure why I never did this before now! Putting together the power feed jack panel, on the other hand, was a bit of a problem.... In the future, when I make one of these power feed jack panels, I'll be sure to leave more room behind the panel for wi...

From Pink Foam To A Miniature World

Image
When I am certain that all the paint and glue is as dry as possible, then I will remove the plastic dropcloth protecting our carpet. It really is amazing how someone can turn a hunk of pink foam insulation into a miniature world within just a matter of hours.   Other than adding a few more little details and making all the permanent electrical connections, this Christmas present is finished and ready for playing.  Right now I just have some electrical leads temporarily twisted on so I could test the track and trains. All worked just fine so, tonight, I started work on more permanent electrical connections to include a couple of jacks mounted on the edge of the layout and then using banana jacks on each type of power source (depending upon which locomotive is used). This last bit of work should only require another hour or so of easy work.  I played around with various locomotives last night using the appropriate power sources for each locomotive... it worked fl...

For Those Who Could Not Envision It...

Image
(As mentioned previously, please do not let Lukey or Kenzie know what they are getting for Christmas... I'm only posting it here because they cannot yet read.) In my previous blog post, I wrote that I had started working on Lukey's Christmas present... an HO scale train set in a dog-bone shape with a donut hole.  Well, for those who could not envision what I was talking about, here it is after cutting the rigid foam to shape... It is looking good!  I wanted a free-form, flowing type of thing rather than just a rigid rectangle or even a perfect oval...  I want the landscape to roll and flow with a nice train running through it. That area adjacent to the train station on the right is for a future town... maybe a couple of small houses, a firehouse, a gas station...  then a road coming toward the front of the photo and leading around to that little freight station on the left side... and, I left some room over there for some other building or detail. With a li...

On To Next Christmas Present

Image
(If any of Lukey's or Kenzie's older cousins are reading this blog... please don't tell them what they are getting for Christmas!) Now that Kenzie's dollhouse is finished...  "finished" meaning finished enough for Christmas...  I'll add more details and more things to play with for future presents... now I am focused on Lukey's Christmas present.  Lukey's present will be a set of trains with some basic scenery. I came up with a plan which would make it large enough for any kids in the 3-5 year old range (actually, it would seem very big to kids this age) yet small enough to easily store in our storage shed or a spare room.   A bit over a year ago, I picked up a "metal train" series of cars and a diesel locomotive which is made specifically for children. The metal cars and locomotive make them a bit more sturdy for young, fumbling hands. The company that manufactured this "metal train" series was going out of business and...

Progress on the Doll Townhouse

Image
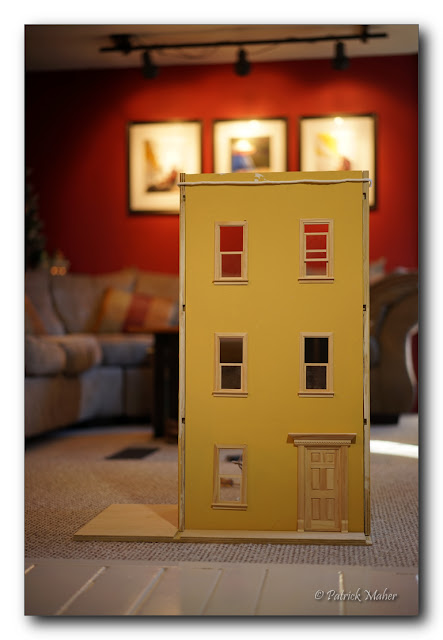
(As I've written before when writing about this Christmas project, since Kenzie is still young enough to make it impossible for her to read this blog entry, there really is no problem in writing and publishing blog entries about her Christmas present so here is an update.) The front facade... before trim... before brick sidewalk... Despite my relatively poor health lately (and for the past three months), I've squeezed in some time here and there during the halfway decent periods to make some progress on the dollhouse Christmas project! It is still unassembled to make it easier to work on different areas of the house. At some point, however, I'll need to assemble this townhouse... glue, screws and nails... and then just finish it with tiny brushes and a lot of patience. For the purpose of this photo, I carefully placed the pieces together and then tied it together with a cord (seen across the top in the first photo). The windows and doors are just placed into thei...

Some Progress on Dollhouse

Image
Everything laid out flat as I visually placed the doors and windows for appealing spacing.   The weather was beautiful the other day so I was able to pull some tools out of the shed to do some woodworking out on our front deck. I am trying to avoid doing any woodworking indoors because of all the sawdust it spreads. The project I chose to work on was the dollhouse. I had some 1/2" cabinet grade plywood available in our shed so I decided to use this for the dollhouse. Now that I've cut and notched everything to its basic shape, in hindsight, I could have used some thinner plywood. The doors I bought for this dollhouse were made for thinner walls so now I'll need to add some scale jamb extensions to the two doors. On the positive side, the five windows are made for 1/2" walls so I'm good to go with those. This townhouse dollhouse is beginning to take shape! I'm looking forward to getting it assembled. Clamped together for a dry fit... all the pieces ...