Posts

Showing posts with the label fn3

Before and After

Image
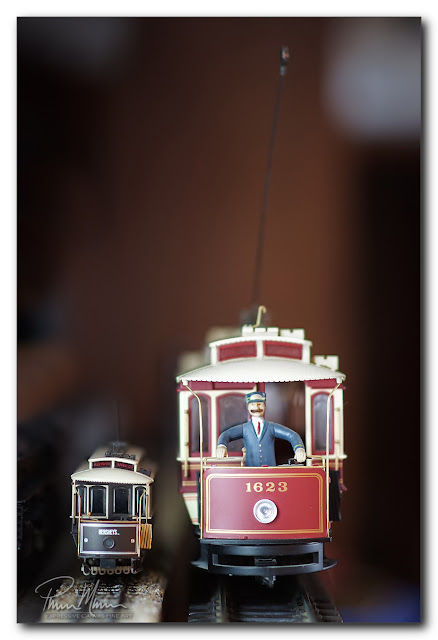
I put together a few comparison "before and after" photos of my large scale trolley and my large scale steam locomotive.  I've been wanting to do this for awhile but never got around to it.  Having just working on the trolley again, I figured it was a good time to capture some "after" photos and then compose "before and after" comparisons. In each comparison photo, the top photo is the train in its stock condition from the factory before I did any work on it while the bottom photo shows the same train after I rebuilt it, repainted it and added details. So, this first comparison photo below is of the trolley.  I purchased the trolley a little over a year ago and immediately started planning for an upgrade and rebuild.  It was not running well when it arrived at my door because the motor had a split gear.  I immediately replaced the motor with Bachmann's replacement drive but, disappointingly and unexpectedly, the brand new assembly still ran quite ...

More Cutting and Rebuilding

Image
I did some more work on my large scale trolley yesterday and today.  This is the same trolley we have on our mantle for Christmas.  I've never really been happy with the rounded front and rear bumpers that this trolley ships with and I felt the trolley was missing a step for passengers stepping up from the street so I went about trying to resolve those problems today.   First, I started making the front and rear bumpers to replace the rather toy-like bumpers.  Well, actually, I started by cutting off the front and rear rounded bumpers.  The original front bumper can be seen in the first photo below.  Then I designed a new bumper to be made using wood.  I wanted a chunkier narrow gauge look so I used wood for this.  Anyway, the photo below shows the front rounded, hollow bumper that I cut off... Below, is a photo of the new bumpers being glued up... Below is a photo of the front end after I cut off the manufactured front bumper.  I could...

Large Scale Street Car

Image
S ince we missed the big train show event a couple of weeks ago, I decided to do some eBay shopping to see if I could find one or two of the items I had planned to search for at the train show.  One of these items was a large scale street car.  I prefer finding these items at shows so I can inspect the item closely rather than just looking at a few photos on eBay.   It turns out that I found what I was looking for very quickly.  It was listed as being in "Excellent" condition and the price was appropriate for a used item in excellent condition so I purchased it.  There were less expensive street cars available but I chose to purchase this particular one because it was listed as "Excellent".  This street car was delivered yesterday.   The trolley was packaged well and it was delivered to me in about three days so that was good.  I appeared to be in very good condition so that was good too.   After unpacking it from its shipping ...

Test Run on Track

Image
The nine feet of used track that I had ordered online the other day arrived today so I was finally able to run this large Fn3 scale steam locomotive on some track for the first time.  A couple of days ago, I spent a little time cleaning and lubricating this old steam locomotive.  I had tested it, running, while it was lying on its side but I had yet to run it on any track...  until today.  When the track arrived, it was in need of cleaning.  The rails were a solid dark brown color indicating they would not conduct nearly enough of the low voltage electricity needed to power any locomotive.  The rails appeared to be completely oxidized.  Actually, it appears as though this track was barely used and probably spent most of its life on a display shelf which is likely what its primary use will be at our home too (along with occasional test runs).  After a few minutes of cleaning, the tops of the rails were nice and shiny again. I didn't clean any of th...

A Foggy Change of Plans

Image
My plan for today was to rip lumber to use as crown molding and baseboard molding as well as build two hollow 'L' shaped beams to cover exposed rough plumbing... I started with measuring for the 'L' shaped beam in the new half bath.  I measured again to make sure I had the correct measurements and then I went outside to the tablesaw to start cutting. I even made a little diagram to go with all my measurements. I reviewed the measurements again before cutting. Before fastening the pieces together to form the 'L' shaped cedar beam, I thought that maybe I should test my measurements by doing a dry fit of each piece... The moment I tried placing these two pieces up on the ceiling where the plumbing is located, I immediately noticed that I somehow screwed up. It turns out that my measurements were fine but I screwed up on what those measurements were truly measuring. What I thought I wrote down were outside, total measurements but, in reality, the measurement...

She Runs!

Image
As I wrote in my previous blog entry, I am in need of a few days of recovery after yesterday's bout with poor health. It is Day 1 of recovery and I am already bored. My boredom and need to accomplish something overruled my need to rest and recover (I may pay for this tomorrow). I pulled the new large scale steam locomotive and its tender down to the floor... grabbed some tools... plugged in a DC transformer from my O scale narrow gauge trains... and started to unscrew hidden screws... No task is simple, especially when trying to recover from anaphylaxis the day before, but I quickly realized that the first four screws I needed to remove were a bit stripped and none of my screwdrivers could hold well enough to be effective. Quickest solution... grind down one of my screwdrivers to make it fit well enough... After some grinding, one of my screwdrivers fit well and I managed to disassemble the tender which houses the sound card. The battery contacts powering the sound card wer...