Posts

Showing posts with the label equatorial

Broken Telescope Tripod Fixed

Image
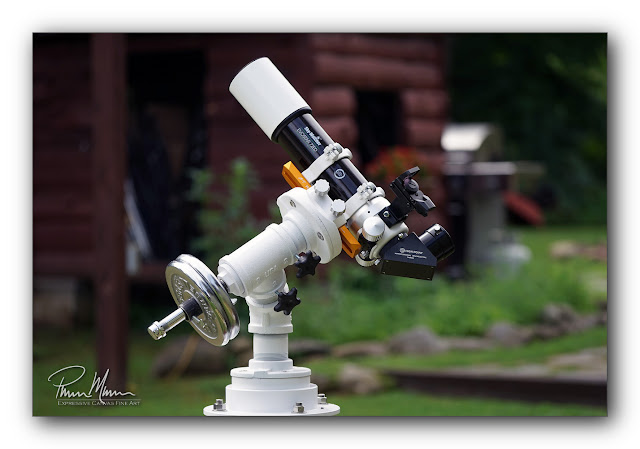
I 've been waiting for some new leg brackets to arrive from England so I could fix the tripod for my little Celestron CG-2 telescope mount.  One of the brackets that holds the legs in place broke about two weeks ago.  This mount is no longer available new so finding brackets was a bit of good luck!  (The new bracket can be seen in the photo at right.) I briefly contemplated just purchasing a newer and better manual mount to replace this broken one.  I had recently upgraded this little manual mount with a new saddle as well as installed ball bearings on both axes.  This upgrade project required a bit of time and effort.  I had cutting and grinding to do...  drilling and tapping to do...  and I had to find the exact right ball bearings to fit each axis.  After my upgrade, this mount was really working very well up until this little bracket broke.  Admittedly, having a newer and slightly better manual mount would be advantageous but, since I had already put so much effort into improvi

Broken Telescope Tripod

Image
W hen I brought my telescope and mount outside the other day to do some solar observing, a leg bracket broke on my tripod as I was opening up the tripod legs.  This bracket holds the leg in place when it is in use and the tripod is useless with a broken bracket.  My day wasn't starting out too well. I wanted to use this particular telescope mount because it has slow motion control knobs.  These slow motion controls make it easier to keep the sun in the center of my view.  As I slowly turn one knob, the sun stays in the center of my view.  Now I had to move the telescope over to another small mount.  I went back to my new-ish Alt-Az manual mount.  I really wanted to use those slow motion controls for this session though so this was a bit of a letdown.  Having another thing break and added to my to-do list was an even bigger letdown.   As you can see in the photo, the tabs that hold the spreader bar snapped off.  I had fairly recently rebuilt this mount with ball bearings and a bette

New Look for Old Telescope

Image
I 'm still mending a sprained MCL in my right knee so I'm still not really accomplishing much on my To-Do list.  Every now and then, however, I feel halfway decent and am able to jump into a small little project at the kitchen table.  This still needs to be short because I need to keep changing positions...  no sitting for a long period of time, no standing for a long period of time.  This keeps the size of these occasional projects on the very small side.  Plus, the longer I work on any project, the more likely I am to do something stupid with my knee.  The last thing I want at this point is to be set back to square one yet again.   I have this old Celestron 70mm refractor telescope that, in recent years, I adapted to a different type of mount.  In order to do that upgrade, I needed to remove a bunch of mounting hardware that was bolted through the optical tube.  This hardware wasn't needed and was in the way of the new mounting cradle rings and dovetail bar so most of the

Pipe Mounts Almost Completed

Image
In between projects, when I have a little bit of time and I'm feeling fairly well, I always go back to some unfinished little projects.  Sometimes the weather interrupts a project.  Sometimes my health interrupts a project.  Sometimes other more important projects get bumped up in priority.  In time, I always get these little projects accomplished.  My health may require a lot more time than healthy people require but I always seem to eventually finish these projects. One of these projects that seems to be an on-going project is making a couple of homemade telescope mounts.  These two adaptable mounts are not 100% completed just yet but they are close.  They are close enough to being complete that I was able to test them a few days ago.  That was a nice feeling! I designed and built two types of mounts...  an equatorial mount (shown in this first photo, below) and an altitude-azimuth mount (shown down lower in the photos).   I have a very lightweight telescope mounted on the mo

Locking Clutches

Image
I made a little more progress on my homemade telescope mounts this morning.  I decided to drill and tap each of the axes on each of these mounts so I can add a clutch of sorts to each axis.   In this first photo, you can see both locking clutches on the equatorial mount.  I drilled and tapped 1/4-20 holes on the edge of each axis.  I can now add some friction to each axis or I can even lock down an axis.   This next photo shows the three locking clutches on the dual telescope altitude-azimuth mount.  Now I can control how much friction is applied to each of the axes.   Although it appears as though the 1/4-20 locking clutch makes direct contact with the threads on the axis, it does not.  I have some heavy leather inside the hole I drilled so the leather is pressed down on the threads of the axis.  This will protect the threads while applying enough pressure to have a useful clutch.  If we had metal on metal, then the threads would quickly be ground down by the metal on meta