Bathroom Project Update
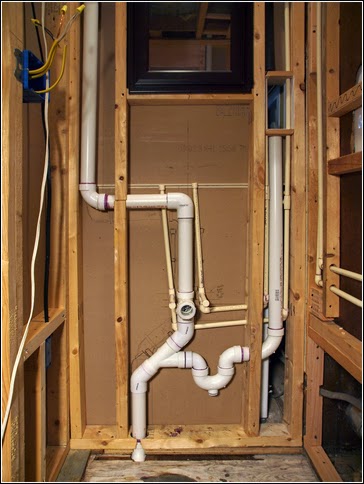 |
| Plumbing for the washing machine and pedestal sink... |
There have, however, been a few mornings during the past month when I felt that I had enough energy for an hour or so of work. On these few days I did manage to get a little bit accomplished on our bathroom project.
I needed to get a bit creative with all the plumbing to make it fit in this small space. In this first photo, at right, you can see some odd 45 degree angles to help make things fit. There was absolutely no room for sweeping elbows!
The waste line running up on the right side of the photo is for the washing machine which is on the other side of that wall. It was extremely tight working in that small space and trying to fit supply plumbing as well as waste plumbing. The great news is that everything is working fine and there are no leaks so far. I still have a little bit of plumbing work to do after I cover the walls in drywall. I will add valves and connect to the fixtures after the drywall is in place, spackled and painted.
 |
| Plumbing for washing machine... |
 |
| Floor is insulated and ready for a vapor barrier and ready for sub-flooring... |
The next photo, above, shows the washing machine drain from the laundry room side of the wall. I needed to build my own little waste plumbing outlet box here. Having waste plumbing as well as hot and cold supplies running through this tight space made things a bit tight but it all worked out in the end.
Another morning, I felt halfway decent again and decided to tackle the insulation. I used rigid insulation for the floor (right). I ended up with tiny pieces of blue styrofoam all over the kitchen and laundry room after cutting all this rigid insulation! This floor now has a layer of sub-flooring installed too.
Before tackling the insulation for the ceiling, I leveled the ceiling joists (old house with no square edges and a lot of sagging) and installed a fan. Of course, I wired that fan as well. The electrical work was done on a different morning when I had enough energy to get an hour of work accomplished.
Below, you can see the insulated ceiling with the fan installed. The good news is that when I finished up the wiring, the fan worked!
So, all in all, things are progressing but my health is really slowing everything down considerably. I'm feeling a bit frustrated and bored waiting for my health to recover so I can finish this bathroom!
 |
| Fan installed, wired and insulation added to ceiling... |
Comments
Post a Comment