The New Telescope
 |
| Sony a6000 camera |
So, after writing about my "first light" experience last night, I realized that I haven't really written anything about this telescope or even the camera I used. Let me start by saying that both of these pieces of equipment are considered "entry-level"... the telescope is an entry-level telescope for just getting started in astrophotography... and the camera is an entry-level, all purpose mirrorless interchangeable lens camera.
Let's start with the camera since that is what actually captures the imaging. It is a Sony a6000 camera body... quite small and almost pocketable... but works great for action photos of the grandchildren as well as wildlife photography. This is also the camera I bring to the hospital because its shutter is quieter than my better camera and because it is a bit smaller than my better camera. This is an old camera by digital standards but it far surpasses entry level cameras produced today by all other manufacturers. I do have a wireless remote as well as a wireless intervalometer to use with this camera but, last night, I simply resorted to using a two second delay on the shutter release button instead. I wanted to keep equipment to a minimum on this first night of astrophotography.
 |
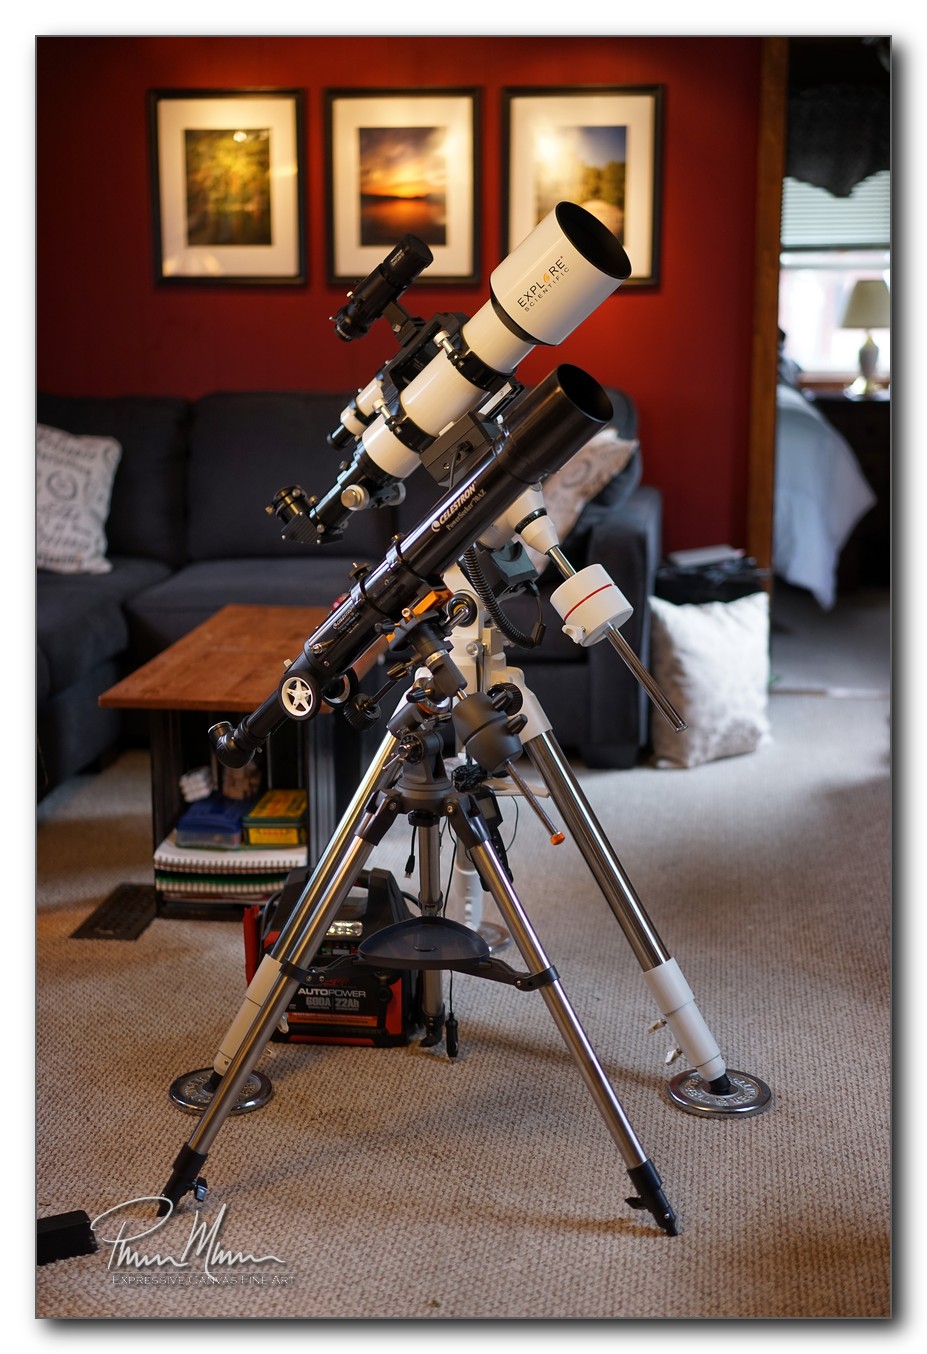
| Explore Scientific ED 102mm Refractor telescope |
The eyepieces I used are in focal lengths of 8mm, 17mm and 24mm and are made by Baader. These eyepieces are in their Hyperion line which provide a relatively wide angle view of 68 degrees and are of high quality. These are very large eyepieces which makes looking through them very easy because the eyepiece glass has a larger-than-usual diameter... it sort of feels like you are looking through a port-hole into space when you peer through these eyepieces. The view that these eyepieces produces really is spectacular.
The other great thing about these particular eyepieces is that they are threaded to accept adapters for mounting lenses or cameras on top of them for imaging. Regardless of whether you are astro-imaging or simply observing, these eyepieces come highly recommended by experienced astronomers.
 |
| Baader Hyperion eyepieces, left, and Orion Expanse eyepieces, right foreground |
This telescope is remarkable, especially for an entry-level scope in astrophotography... the camera is capable of some exceptionally sharp 96 megapixel images... the eyepieces are impressive and nothing like those tiny eyepieces that come packaged with smaller, inexpensive telescopes... the only other potential weak link in the astrophotography chain is the sky condition.
 |
| Explore Scientific ED102, in white, Celestron 70mm, in foreground |
Oh, the other thing I should mention is how rushed things turn out to be when attempting astrophotography. First, it takes about 45 minutes to an hour just to set up and align the telescope outdoors. It can require another 45 minutes or so to set up and calibrate an autoguider finderscope which is necessary for most astrophotography (I forgo this option last night). Trying to find equipment in the dark eats up valuable observing time. Next, there are trees all around our house so, as the Earth rotates, the stars and the moon come and go behind this tree or that tree. Also, as the Earth rotates, some things rise in the sky while others sink below the horizon. Most things are only visible in the sky for part of the already short night. Lastly, the days of daylight are approaching the longest of the year now so nighttime viewing is limited each night. All of these factors make for a rushed night of astrophotography.
 |
| The moon captured through the Explore Scientific ED 102mm telescope |
Trying to assemble and disassemble all these eyepieces, adapters, lenses, and cameras in the dark is challenging so that eats up more time as you struggle trying to find things and piece things together in the dark. Incidentally, flashlights are the enemy here because it takes the human eye so long to adjust to complete darkness. A bright flashlight means you need to start that long process of adapting to the dark all over again. Minimal red light is okay but regular flashlights are the enemy for astronomy. This fumbling around in the dark wastes a lot of time.
When shooting celestial objects, you aim for multiple long exposures and then stack these long exposures in software on your computer to make them even longer exposures and to add more detail in the image. Shooting these long exposures eats up time as well. On the positive side, the computer processing work can happen anytime after the nighttime observing session.
I'm really excited about this gear and the potential for viewing and capturing astrophotography images of celestial objects. Last night was fun and I came away from it with a few pretty good images.
It should be a fun summer!
Comments
Post a Comment