Playhouse Construction
Although I spent a solid two weeks renovating the playhouse this June, this project really started at the end of last summer.
Last summer, we added an outdoor kitchen to the back of this little playhouse. I tied the roof of the playhouse in with the roof for the kitchen. That was a project in itself. The old roof on the playhouse was partially collapsed, leaking and in generally poor condition so it was time to replace the roof anyway. So, last summer, I installed a new roof on the playhouse to include adding a homemade skylight and replacing more than half of the roof framing. I built a dormer roof off of the playhouse roof that would extend out to posts to cover the outdoor kitchen area.
I never did finish the outdoor kitchen last summer before the snow arrived so even that project wasn't finished. The grill in the kitchen was usable through the winter and I had a nice U-shaped kitchen countertop but the cabinets were not finished nor was the sink plumbed. I would finish up the rest of the kitchen project after completing the playhouse renovation (I finished the outdoor kitchen project in two days after I finished renovating the playhouse).
So I had an entire winter to ensure the roof was solid and not leaking. Everything was still looking good with the new roof so I didn't need to do anything with the roof this year.

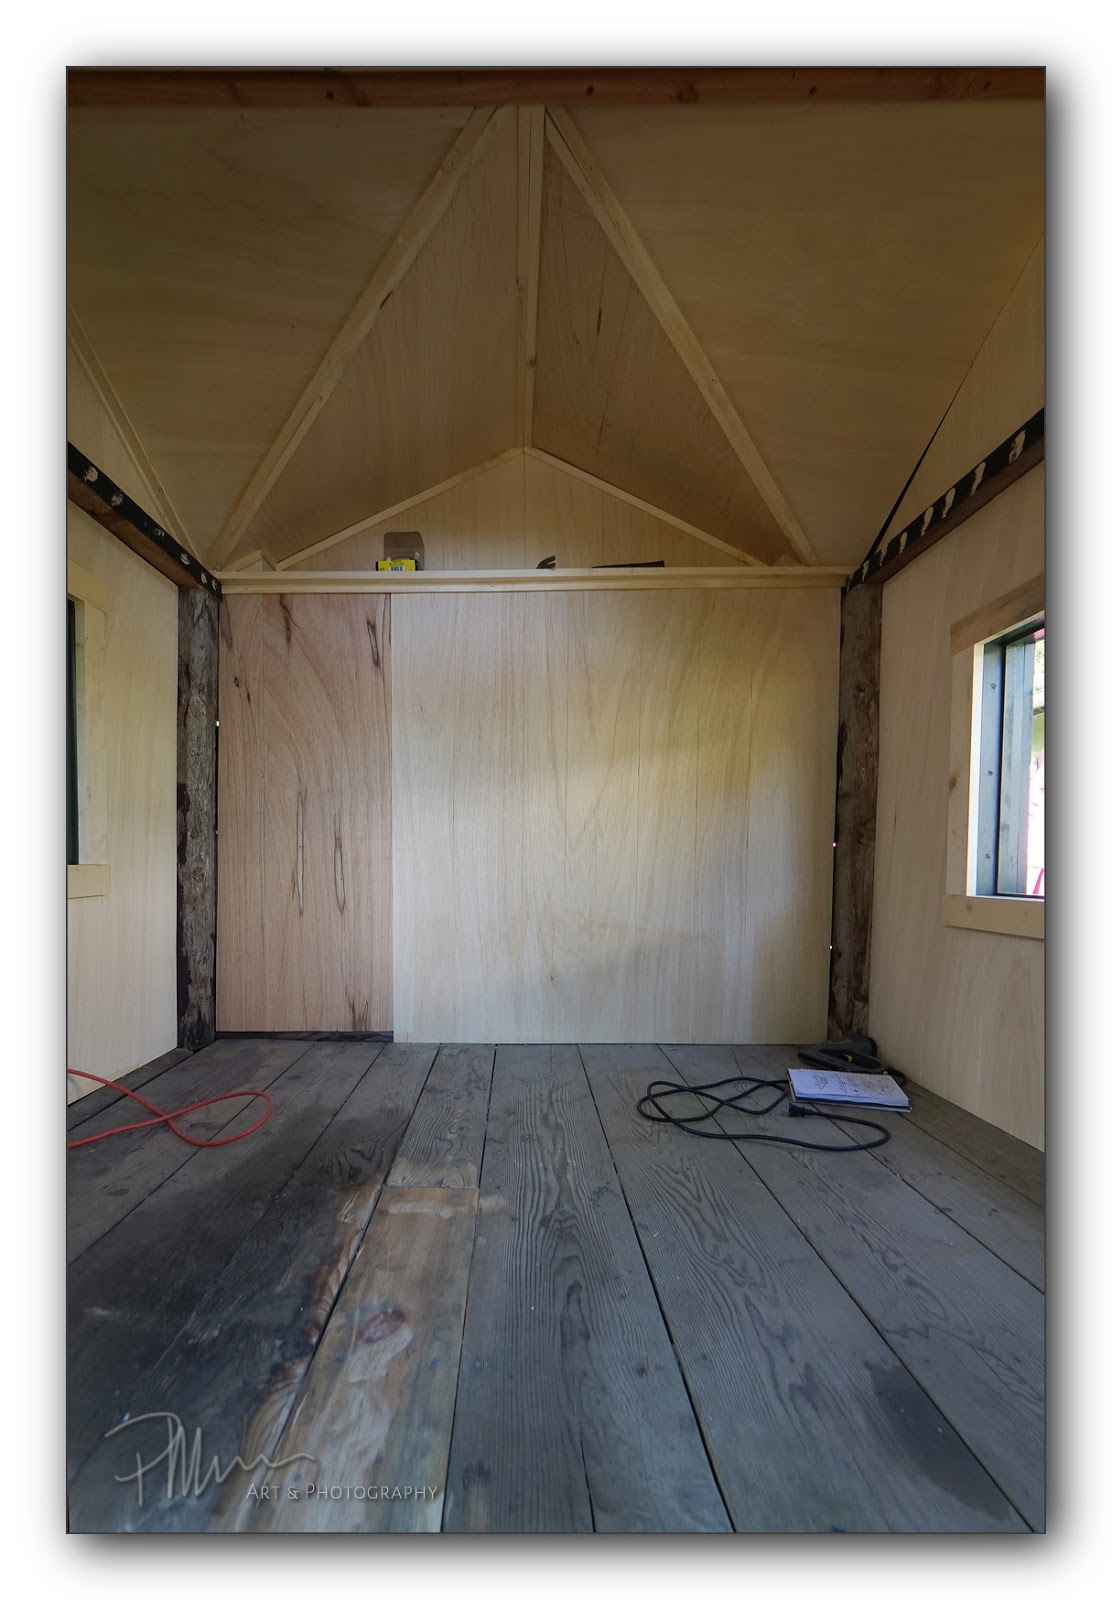
When I started tackling this project, the playhouse was just a barebones shell more resembling a dark cave than a playhouse. There was no deck, no door frame, no door, no window frames, and a lot of rotting wood.
In the next photo, you can see the rebuilt roof structure including the homemade skylight. I also needed to replace some of the original subflooring before I went much further with this project.

As you can see by the bins left in the playhouse, we had been using this old playhouse as a storage shed for about ten years. We kept a lot of our summer stuff in here.

And one last photo of the basic structure before any of this year's renovations... even before I added the little deck off the front of the playhouse...


After tackling replacing the rotted floor boards, I decided to get started on framing out the windows and door. I wanted screens on this structure since the bugs get quite thick in our area every summer. Here is a shot of the first window frame I built...


Here is a closeup photo showing what I had to do to frame out the windows and door. Since the walls are made from logs, I had to fit these frames perfectly matching each log. Needless to say, this took a little bit of time compared to normal windows.

While I was building and installing the door frame, I found more rotted wood under the door so I decided to add a support across the entire front of the playhouse. I had to pull out the chisel and hammer to make this fit into the bottom log.

I quickly put some paint on the new frames before it started raining...


Now it was time to start covering the interior walls and ceiling. I decided to use cheap Lauan underlayment plywood for this. I didn't want the walls and ceiling to be completely flat though so I etched some grooves into the plywood to resemble individual boards. I had never done this before but it came out nicely! I used the edge of a putty knife run down a metal straight edge to etch the grooves. Now the plywood resembles individual planks rather than one large piece of plywood.


Once I installed all the plywood wall and ceiling covering, I started to add trim and there was a lot of trim to install. At this point, however, the playhouse was beginning to look more "solid"...

Now that the playhouse was completely covered in new plywood, it was beginning to lighten up which was my intention. The different colors in pieces of plywood would be resolved with paint.

Also, once the plywood was installed, I could finish trimming the windows, door and skylight. This made a big difference too!


As you can see in the next photo, the deck is now installed. I know I shot some photos while I was building the deck but I can't find them anywhere on my hard drive so no photos of the deck build will be included here, unfortunately. The deck build was pretty straight-forward though.


The building inspector (Sheila) visited each evening...


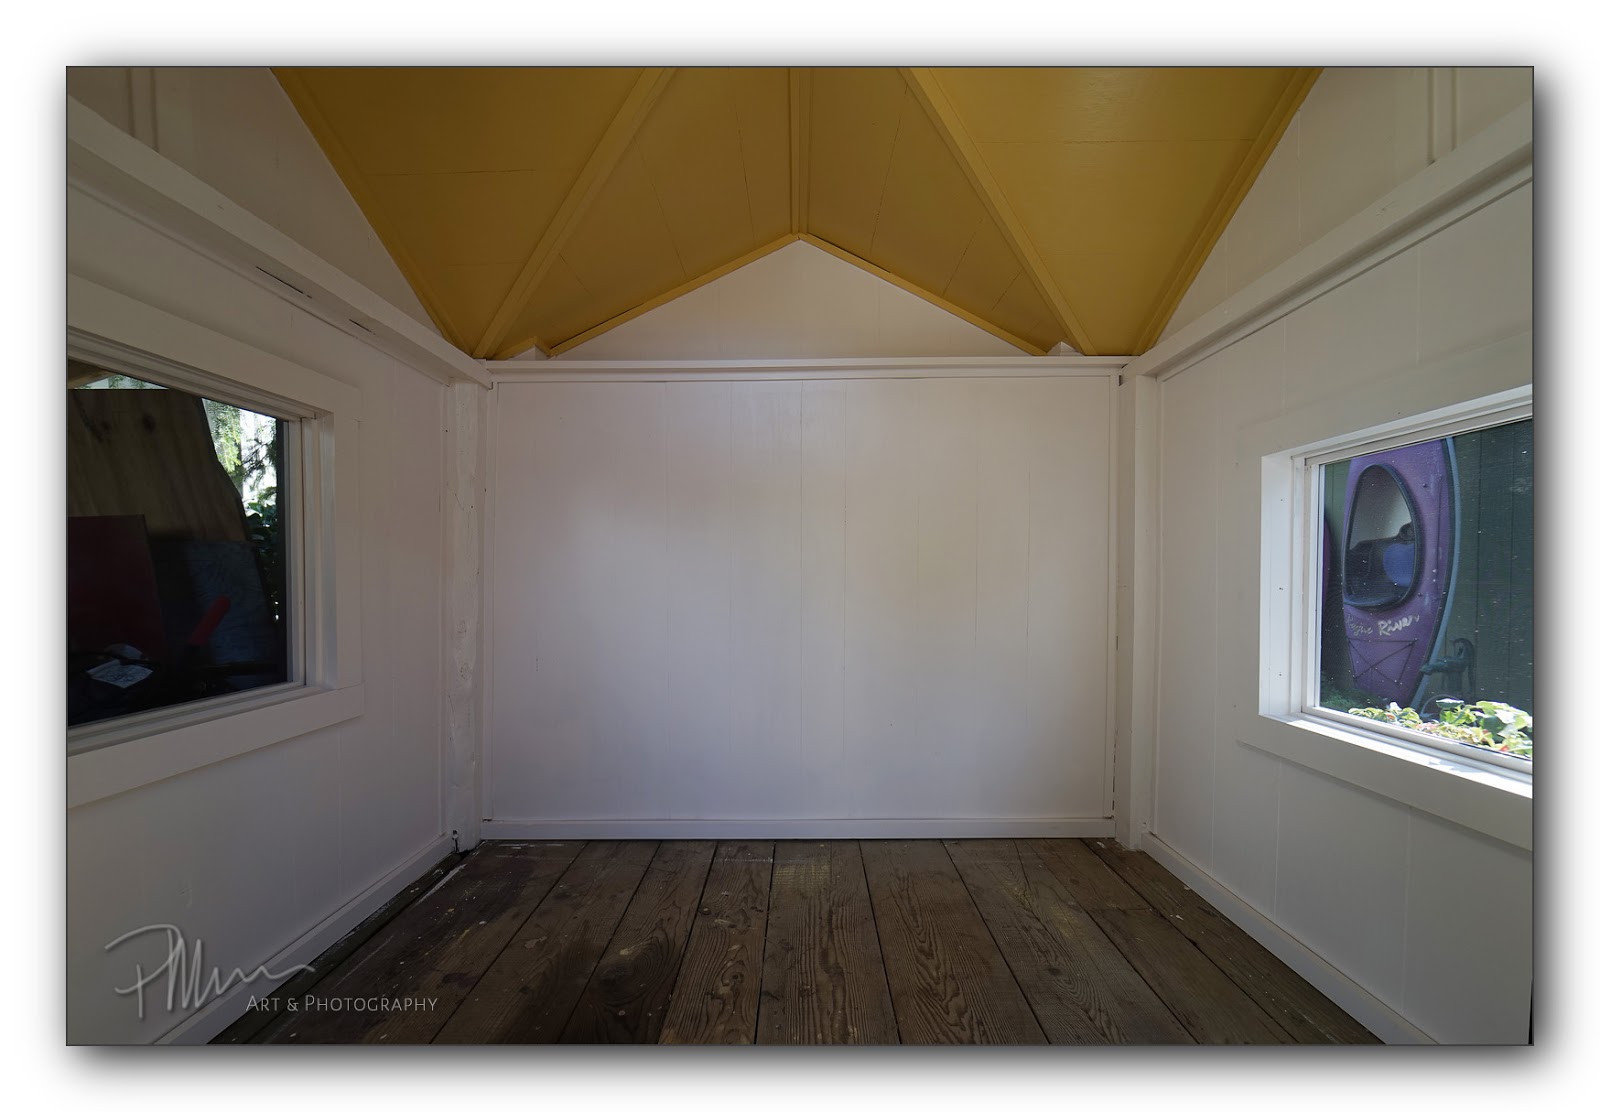
It was time to begin painting the interior. This really lightened up the playhouse and made it more playhouse-like rather than dark cave-like.

Painting took a bit more time and effort than anticipated because the new plywood just sucked up the paint. I think I needed to apply three coats of paint and then I still applied a coat of polyurethane to the ceiling because it was still a little too flat for my taste. I had a Caribbean Beach House paint scheme in mind so I needed the ceiling to have a mild sheen to it. Nice and clean...

Finishing this assembled ceiling required a lot of measuring and cutting... both for the plywood and the trim. I took it one measurement and one piece at a time. This was brutal on my spinal injuries though! Plus, the roof is so low in the playhouse that I can't stand upright inside the playhouse. My legs and spine are still screaming at me!


At this point, the screens are installed. This was another little problem area though. All the local stores were out of screen frames and associated hardware so I had to get creative with what I had on hand and make my own. I used some leftover aluminum frames for the door screen and I made wood frames for the windows. It worked out okay but this was a compromise and it ate up some extra time and energy.
I had originally planned to paint the interior door trim white like the rest of the interior trim... white. Actually, I did put one coat of white on the door trim. Before it was even dry, however, I realized that the white trim around the door would get filthy very quickly from little dirty hands constantly rubbing across it while entering and exiting the playhouse. I instantly decided to use the green trim paint that I used on the exterior here on the interior trim as well to help hide all of that dirt.

It was time for the rest of the finish work and little details. I installed the electrical wiring, lighting, framed watercolor art, a blackboard, and the flooring.


In this next photo, you can see that the flooring is finally installed. I had some cheap laminate flooring lying around and decided to use that for this project. This taught me to never use thin laminate flooring for another project for as long as I live! This is 6mm flooring and it is absolute junk! It proved to be a frustrating pain-in-the-butt to install. I've installed much better, heavier laminate flooring and installing that thicker stuff was a piece of cake. This 6mm flooring is junk though which made the install incredibly frustrating. I got it done though and it does look great and, honestly, the kids would have no idea whether I installed 12mm flooring or 6mm flooring anyway. The install was no fun whatsoever though...


It's funny... the skylight wasn't part of the original renovation plan. Adding the skylight was something I thought of when I was replacing the roof last summer. Once I removed a single roof panel, I called Sheila over and asked her to look at what that one missing panel did for the inside of the playhouse... she agreed that it looked amazingly bright. Then I explained that I could easily make a skylight by using a clear roofing panel for one narrow section of roof. She liked the idea so I added a skylight to the plan.
I decided to use a clear corrugated roof panel for the center section of this roof and then frame a skylight frame underneath it inside the playhouse. The clear roof panel is flanked by standard metal corrugated roof panels. This turned out to be a great idea and makes a tremendous difference!

A few photos of the homemade lighting fixtures... The Big Dipper...

Cepheus constellation, which resembles a house...

And, The Little Dipper...

These homemade light fixtures throw light upward to the ceiling to create a nice soft ambient light. They also scatter starry dots of light across the entire playhouse. It is a really nice effect!


We added some pillows, books, games, a blackboard, curtains, watercolor images of local wildlife...


We also added Amazon Alexa to the playhouse so we can use it as an intercom with the other Amazon Echo devices throughout our house. The kids can contact us at any time and, better yet, we can "drop in" on them at any time. This also provides the kids with some music and info while in the playhouse. I mounted it on the wall using some 16 gauge wire. (And, yes, the color of the light switch, outlet and cover does not match the rest of the playhouse... I resorted to using a leftover switch/outlet combo from older projects.)


This was a fun little project and I think everyone is happy with the results. Now, we just need to get this pandemic behind us so that the kids can spend a lot of time here playing in their playhouse!
I know the kids enjoyed it on their first day this past weekend. Even Liza and Whitney seemed to enjoy revisiting their old playhouse with their own children. There is no doubt that the playhouse is looking much nicer sitting in our yard now than it did for the past 12 years too!
This was a great and very useful little project!
Last summer, we added an outdoor kitchen to the back of this little playhouse. I tied the roof of the playhouse in with the roof for the kitchen. That was a project in itself. The old roof on the playhouse was partially collapsed, leaking and in generally poor condition so it was time to replace the roof anyway. So, last summer, I installed a new roof on the playhouse to include adding a homemade skylight and replacing more than half of the roof framing. I built a dormer roof off of the playhouse roof that would extend out to posts to cover the outdoor kitchen area.
I never did finish the outdoor kitchen last summer before the snow arrived so even that project wasn't finished. The grill in the kitchen was usable through the winter and I had a nice U-shaped kitchen countertop but the cabinets were not finished nor was the sink plumbed. I would finish up the rest of the kitchen project after completing the playhouse renovation (I finished the outdoor kitchen project in two days after I finished renovating the playhouse).
So I had an entire winter to ensure the roof was solid and not leaking. Everything was still looking good with the new roof so I didn't need to do anything with the roof this year.

When I started tackling this project, the playhouse was just a barebones shell more resembling a dark cave than a playhouse. There was no deck, no door frame, no door, no window frames, and a lot of rotting wood.
In the next photo, you can see the rebuilt roof structure including the homemade skylight. I also needed to replace some of the original subflooring before I went much further with this project.

As you can see by the bins left in the playhouse, we had been using this old playhouse as a storage shed for about ten years. We kept a lot of our summer stuff in here.

And one last photo of the basic structure before any of this year's renovations... even before I added the little deck off the front of the playhouse...

Here is a quick shot of the back end of the playhouse where I built the outdoor kitchen. This photo shows how I tied in the roof to cover both the kitchen and the playhouse. I really like the way this worked out!

After tackling replacing the rotted floor boards, I decided to get started on framing out the windows and door. I wanted screens on this structure since the bugs get quite thick in our area every summer. Here is a shot of the first window frame I built...


Here is a closeup photo showing what I had to do to frame out the windows and door. Since the walls are made from logs, I had to fit these frames perfectly matching each log. Needless to say, this took a little bit of time compared to normal windows.

While I was building and installing the door frame, I found more rotted wood under the door so I decided to add a support across the entire front of the playhouse. I had to pull out the chisel and hammer to make this fit into the bottom log.

I quickly put some paint on the new frames before it started raining...


Now it was time to start covering the interior walls and ceiling. I decided to use cheap Lauan underlayment plywood for this. I didn't want the walls and ceiling to be completely flat though so I etched some grooves into the plywood to resemble individual boards. I had never done this before but it came out nicely! I used the edge of a putty knife run down a metal straight edge to etch the grooves. Now the plywood resembles individual planks rather than one large piece of plywood.


Once I installed all the plywood wall and ceiling covering, I started to add trim and there was a lot of trim to install. At this point, however, the playhouse was beginning to look more "solid"...

Now that the playhouse was completely covered in new plywood, it was beginning to lighten up which was my intention. The different colors in pieces of plywood would be resolved with paint.
Also, once the plywood was installed, I could finish trimming the windows, door and skylight. This made a big difference too!


As you can see in the next photo, the deck is now installed. I know I shot some photos while I was building the deck but I can't find them anywhere on my hard drive so no photos of the deck build will be included here, unfortunately. The deck build was pretty straight-forward though.


The building inspector (Sheila) visited each evening...


It was time to begin painting the interior. This really lightened up the playhouse and made it more playhouse-like rather than dark cave-like.

Painting took a bit more time and effort than anticipated because the new plywood just sucked up the paint. I think I needed to apply three coats of paint and then I still applied a coat of polyurethane to the ceiling because it was still a little too flat for my taste. I had a Caribbean Beach House paint scheme in mind so I needed the ceiling to have a mild sheen to it. Nice and clean...
Finishing this assembled ceiling required a lot of measuring and cutting... both for the plywood and the trim. I took it one measurement and one piece at a time. This was brutal on my spinal injuries though! Plus, the roof is so low in the playhouse that I can't stand upright inside the playhouse. My legs and spine are still screaming at me!


At this point, the screens are installed. This was another little problem area though. All the local stores were out of screen frames and associated hardware so I had to get creative with what I had on hand and make my own. I used some leftover aluminum frames for the door screen and I made wood frames for the windows. It worked out okay but this was a compromise and it ate up some extra time and energy.
I had originally planned to paint the interior door trim white like the rest of the interior trim... white. Actually, I did put one coat of white on the door trim. Before it was even dry, however, I realized that the white trim around the door would get filthy very quickly from little dirty hands constantly rubbing across it while entering and exiting the playhouse. I instantly decided to use the green trim paint that I used on the exterior here on the interior trim as well to help hide all of that dirt.

It was time for the rest of the finish work and little details. I installed the electrical wiring, lighting, framed watercolor art, a blackboard, and the flooring.


In this next photo, you can see that the flooring is finally installed. I had some cheap laminate flooring lying around and decided to use that for this project. This taught me to never use thin laminate flooring for another project for as long as I live! This is 6mm flooring and it is absolute junk! It proved to be a frustrating pain-in-the-butt to install. I've installed much better, heavier laminate flooring and installing that thicker stuff was a piece of cake. This 6mm flooring is junk though which made the install incredibly frustrating. I got it done though and it does look great and, honestly, the kids would have no idea whether I installed 12mm flooring or 6mm flooring anyway. The install was no fun whatsoever though...


It's funny... the skylight wasn't part of the original renovation plan. Adding the skylight was something I thought of when I was replacing the roof last summer. Once I removed a single roof panel, I called Sheila over and asked her to look at what that one missing panel did for the inside of the playhouse... she agreed that it looked amazingly bright. Then I explained that I could easily make a skylight by using a clear roofing panel for one narrow section of roof. She liked the idea so I added a skylight to the plan.
I decided to use a clear corrugated roof panel for the center section of this roof and then frame a skylight frame underneath it inside the playhouse. The clear roof panel is flanked by standard metal corrugated roof panels. This turned out to be a great idea and makes a tremendous difference!

A few photos of the homemade lighting fixtures... The Big Dipper...

Cepheus constellation, which resembles a house...

And, The Little Dipper...

These homemade light fixtures throw light upward to the ceiling to create a nice soft ambient light. They also scatter starry dots of light across the entire playhouse. It is a really nice effect!


We added some pillows, books, games, a blackboard, curtains, watercolor images of local wildlife...


We also added Amazon Alexa to the playhouse so we can use it as an intercom with the other Amazon Echo devices throughout our house. The kids can contact us at any time and, better yet, we can "drop in" on them at any time. This also provides the kids with some music and info while in the playhouse. I mounted it on the wall using some 16 gauge wire. (And, yes, the color of the light switch, outlet and cover does not match the rest of the playhouse... I resorted to using a leftover switch/outlet combo from older projects.)


This was a fun little project and I think everyone is happy with the results. Now, we just need to get this pandemic behind us so that the kids can spend a lot of time here playing in their playhouse!
I know the kids enjoyed it on their first day this past weekend. Even Liza and Whitney seemed to enjoy revisiting their old playhouse with their own children. There is no doubt that the playhouse is looking much nicer sitting in our yard now than it did for the past 12 years too!
This was a great and very useful little project!
Comments
Post a Comment