Started Weathering
My large scale steam locomotive kitbash is still coming along. This project is taking far longer than I anticipated but at least it is coming along nicely.
Yesterday, I started the day by adding trim to the cab and then I spent the rest of the morning and into the afternoon continuing the weathering that I had previously started on the backhead of the cab. This time, I was weathering the outside of locomotive and tender rather than just inside the cab.
I'm finding that getting the weathering just right is a delicate balance of differing subtle colors... ie, rust, white discolored corrosion, and simple weathering of varying shades. I find that I do a bit of weathering in one color and then I need to add other subtle colors to tone down what I had previously done.
Before I started weathering yesterday, I finished all I plan to do with the cab on this project. The ceiling is done... the cab is painted... I installed trim on the windows... details added... cab details painted... It is looking good! The only things I plan to add to the cab are the engineer and perhaps some tools. (Hmmm... I just remembered that I still need to add a light to the ceiling of the cab.)


The trucks on the tender are looking pretty good but I think I forgot to weather the wheels...


It is pretty cool making plastic appear as though it is metal... weathered and rusted metal. This is worlds better than the shiny factory-dyed molded plastic that we had before I started this little project. (See photo below.)

Since I will only be running this locomotive outdoors, I think I'll finish up the final touches of weathering outside in sunlight. I suspect that the weathering will need to be toned down significantly outdoors under bright light. That being said, the light that I have been using indoors (which is the same light used for the photos) is pretty bright too but I'm sure this locomotive and tender will look a bit differently in the bright sunlight. I do want this to look the best it can (ie, most realistic as possible) when outside under the bright, unforgiving sun though so I'll finish the weathering outdoors.
I'm also waiting on some dry transfer letters to arrive. I ordered one package of 1/2 inch letters and numbers but the one package was ridiculously small. This is supposed to be for trains yet it only came with three "R"s. So, if you want your railroad name to end in "RR", you only have enough R's to letter one side of the tender! I was short on other letters too but "R" was a good example of the problem with these dry transfer sheets. Even worse, there was only one of each single digit number! What if my locomotive was numbered 3333? And the number needs to be on both sides of the cab? Do they really think I should purchase eight lettering/numbering packages?
What a complete waste of money that was, however, since I already started this project with dry transfer numbers on the cab, I want to finish it this way so I ordered another set. In the future, I'll be painting my own letters and numbers by hand (however, only in this large scale). In the meantime, I need another package of numbers so I can number the other side of the cab.
Incidentally, the numbers on the first side of the cab didn't transfer well so I ended up having to paint over part of the "49". I lettered one side of the tender with "SGRR" for Southern Garden Railroad but those letters fared even worse so they are no longer seen... what is left of them anyway. Now I just need to get a 4 and a 9 transferred to the other side of the cab and I'm all set. If I need to add some paint to it, I'll do that. I will never purchase dry transfer lettering kits again though.
This project is coming along... it's coming along far more slowly than anticipated but it is coming along...
End of Day Addition: I had a little bit of time at the end of the day to set up the locomotive and tender outside on a few pieces of track so I could shoot some photos. As always, I'll use these photos to adapt the weathering even further tomorrow morning. Hopefully that will be the final weathering session for the locomotive and tender.

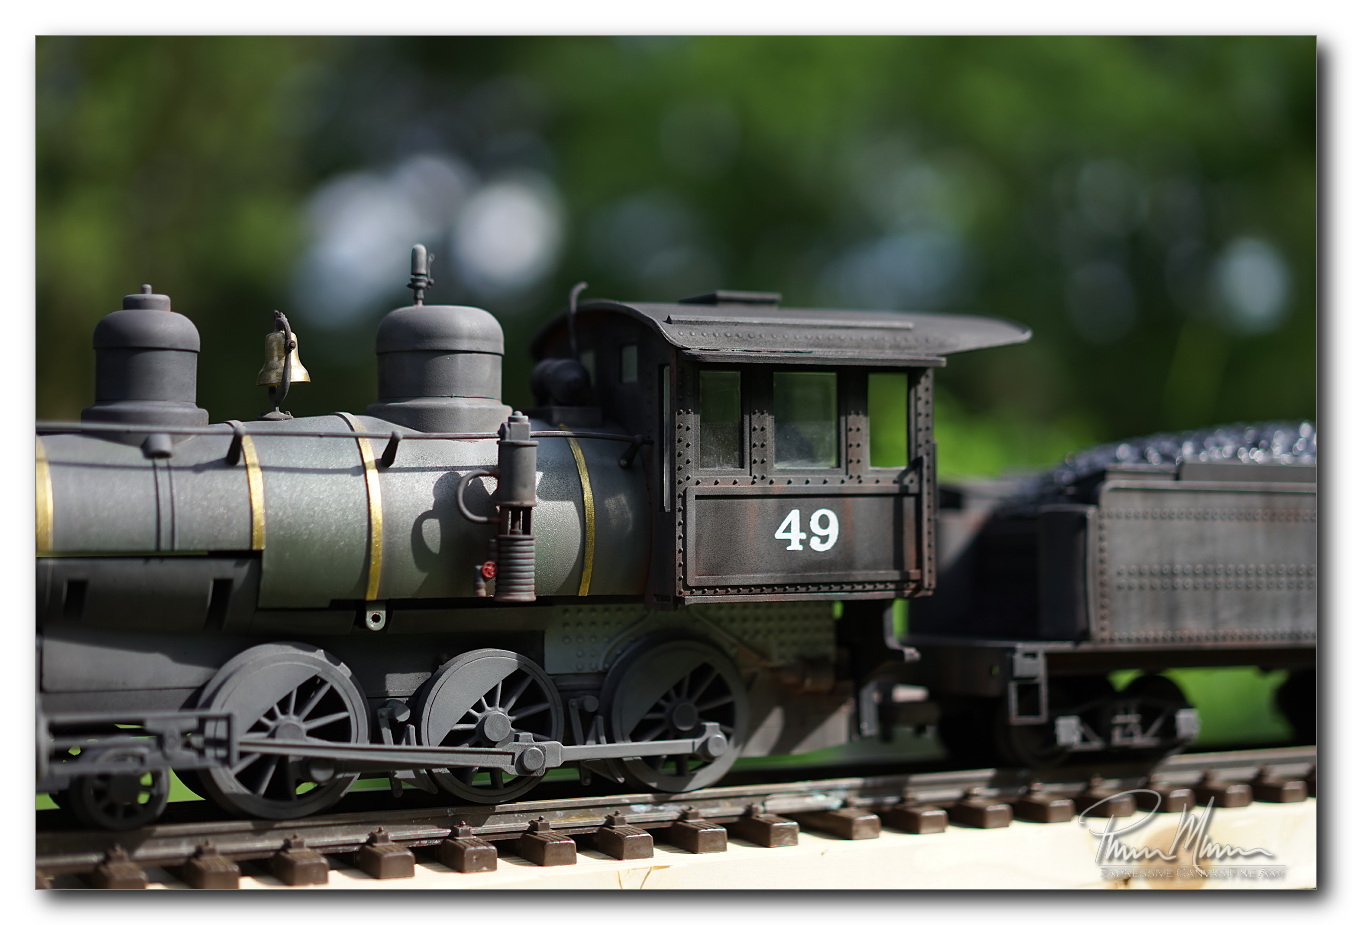


I have to say that this is looking better than I thought it would when illuminated out in the bright sunlight. This type of light is very unforgiving but this locomotive is looking pretty nice! This locomotive is now a far cry from the shiny, toy-like, plastic, brightly-colored locomotive it once was when I first purchased it at a train show.
I still have a little bit to do tomorrow but I'm liking what I'm seeing here.
I have some passenger cars and freight cars that I want to lightly weather... mostly the trucks and couplers but I'll also lightly weather some of the roofs (I know the proper spelling is rooves but I suspect few will understand the proper form of the word), the corners and bottom edges where corrosion and rust would normally be seen. I'm in no hurry to get to those cars though.
My next priority will be getting the electronics inside the tender and getting the locomotive running again. Then I'll probably focus on setting up the elevated roadbed for the track around our southern garden in our backyard.
Comments
Post a Comment