Stubborn Holes
I've been actively working on building and installing a new half bath in our house over the past couple of weeks. "Actively working", considering my health, means working on it only on relatively good health days for a few hours each morning. To say this is a slow moving project is an accurate statement.
One of the problems with only working on a project of this sort a few hours at a time is that I spend far too much time setting up, cleaning up and searching for tools I put away a night or a few nights earlier. Unfortunately, I don't have the energy to do anything longer than a few hours in a day so I do what I can when I am feeling capable.
My health is kind of lousy today and tonight so I am spending a little time on the computer and thought I should share about a problem I had with this bathroom project over the past few days...
The latest frustrating problems arose while working on our drainage plumbing. This area where I am installing a half bathroom was once a rudimentary laundry room. On the positive side, this means that plumbing was nearby. On the negative side, none of the existing plumbing will work in its current location so I need to remove a significant portion of plumbing and then install what is necessary where it belongs.
I have two areas that need to be vented to the roof. The current plumbing venting is poor, at best, but that is a story for another time. In order to properly install this bathroom I need to run two vent lines to the roof. This involved designing waste plumbing for a very small room where tight turns are necessary. This tight area made design a bit difficult.
Once I designed this plumbing plan and drew it out on the walls and floor, I attempted to start drilling out all the large holes through wall studs, top plates, sole plates and roofing material. This typically is not much of a problem but I hit a few snags on my first hole to the attic...
On this first drilling, I hit a nail... then, after getting through the nail, I hit a galvanized screw. These two snags dulled my hole saw bit considerably. Even though the large 2 inch bit was dull, I managed to cut a few of the easier holes through new wood... until I burned out my drill's motor!
Now I not only needed a new hole saw bit but I also needed a new drill. The drill was hot... very hot! It was so hot that I let it cool down for about a half hour before attempting to drill any more holes. After a half hour, the drill was still almost too hot to hold so I put it in the freezer. After it finally cooled down I managed to make a little more headway on some of the easier, newer wood. I didn't get far, however, before the drill's motor burned out and stopped working altogether.
I went to Lowes and picked up a nice, new, 8 amp DeWalt drill. While we were at Lowes, we priced a few other supplies and picked up a new hole saw bit to replace my bit which was ruined by a nail and galvanized screw.
I was excited to get these holes drilled so I unpacked the new drill and the new hole saw bit and went to town on one of the vent holes to the roof... I quickly and easily cut through one layer of new wood but then couldn't make any headway again. While I was excitedly trying to pry the cut wood out of the hole saw, my screwdriver slipped and put a nice gash in my forearm. Well, that quickly put an end to any more progress.
I didn't need any stitches but the gash was bloody and needed some bandaging held in place with tape wrapped around my arm to keep the wound closed with pressure. I reluctantly called it a night, cleaned up and headed to bed. The following morning (this morning), I awoke with a plan and was determined to get these holes cut.
I decided to tackle the very stubborn venting to the roof from the attic space above. I had already drilled a 1/4" pilot hole up into the attic space with an 18" long bit so I was able to see where to cut when I crawled through the attic space. Unfortunately, I hit another snag...
It turns out that the pilot holes were in terrible places... one pilot hole popped into the attic flush against a floor joist when it needed to be at least 1 1/2" from any joist. The other pilot hole popped up right in the middle of a roof joist/flooring joist joint. This meant I needed to figure out how to reroute the plumbing venting to the roof... more time consuming bad news.
I came up with a new plan... removed some new framing for the bathroom... cut some studs... and then started re-drilling new pilot holes. I again climbed and crawled up and through the attic space and squeezed into the areas where the new pilot holes found clean routes. It was much easier to drill this time even though it was a difficult and cramped place to be... which didn't help my struggles with claustrophobia!
All the holes are drilled now. In the end, we spent about $120 on new tools to accomplish this little task! On the positive side, the tools can be used for future tasks and projects.
About the big gash in my forearm... well, I guess I'll have one more scar to add to my collection...
I hope the rest of this project goes more smoothly... we really could use a second bathroom... soon!
One of the problems with only working on a project of this sort a few hours at a time is that I spend far too much time setting up, cleaning up and searching for tools I put away a night or a few nights earlier. Unfortunately, I don't have the energy to do anything longer than a few hours in a day so I do what I can when I am feeling capable.
My health is kind of lousy today and tonight so I am spending a little time on the computer and thought I should share about a problem I had with this bathroom project over the past few days...
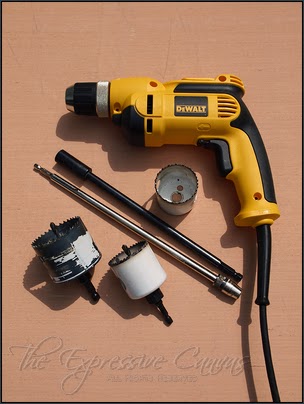 |
| The new drill and hole saw necessary for this small half bathroom installation. |
I have two areas that need to be vented to the roof. The current plumbing venting is poor, at best, but that is a story for another time. In order to properly install this bathroom I need to run two vent lines to the roof. This involved designing waste plumbing for a very small room where tight turns are necessary. This tight area made design a bit difficult.
Once I designed this plumbing plan and drew it out on the walls and floor, I attempted to start drilling out all the large holes through wall studs, top plates, sole plates and roofing material. This typically is not much of a problem but I hit a few snags on my first hole to the attic...
On this first drilling, I hit a nail... then, after getting through the nail, I hit a galvanized screw. These two snags dulled my hole saw bit considerably. Even though the large 2 inch bit was dull, I managed to cut a few of the easier holes through new wood... until I burned out my drill's motor!
 |
| The plugs of wood and metal I had to cut to route and vent our little bathroom. |
I went to Lowes and picked up a nice, new, 8 amp DeWalt drill. While we were at Lowes, we priced a few other supplies and picked up a new hole saw bit to replace my bit which was ruined by a nail and galvanized screw.
I was excited to get these holes drilled so I unpacked the new drill and the new hole saw bit and went to town on one of the vent holes to the roof... I quickly and easily cut through one layer of new wood but then couldn't make any headway again. While I was excitedly trying to pry the cut wood out of the hole saw, my screwdriver slipped and put a nice gash in my forearm. Well, that quickly put an end to any more progress.
 |
| Being careless with a screwdriver... a nice gash in my arm... |
I decided to tackle the very stubborn venting to the roof from the attic space above. I had already drilled a 1/4" pilot hole up into the attic space with an 18" long bit so I was able to see where to cut when I crawled through the attic space. Unfortunately, I hit another snag...
It turns out that the pilot holes were in terrible places... one pilot hole popped into the attic flush against a floor joist when it needed to be at least 1 1/2" from any joist. The other pilot hole popped up right in the middle of a roof joist/flooring joist joint. This meant I needed to figure out how to reroute the plumbing venting to the roof... more time consuming bad news.
I came up with a new plan... removed some new framing for the bathroom... cut some studs... and then started re-drilling new pilot holes. I again climbed and crawled up and through the attic space and squeezed into the areas where the new pilot holes found clean routes. It was much easier to drill this time even though it was a difficult and cramped place to be... which didn't help my struggles with claustrophobia!
All the holes are drilled now. In the end, we spent about $120 on new tools to accomplish this little task! On the positive side, the tools can be used for future tasks and projects.
About the big gash in my forearm... well, I guess I'll have one more scar to add to my collection...
I hope the rest of this project goes more smoothly... we really could use a second bathroom... soon!
Comments
Post a Comment