More Super 8 Emulation Experimenting
I've been spending quite a bit of time trying to emulate Super 8 video footage fairly accurately and I have now come quite close.
The two biggest factors in trying to get this emulation believable turned out to be, first, making sure I shoot in a rather flat color profile and, second, learning more about the hundreds of video effects I have with my video editing software. "Learning" about these video effects means knowing what each is supposed to do and learning how to effectively use each effect. This alone was a time consuming process.
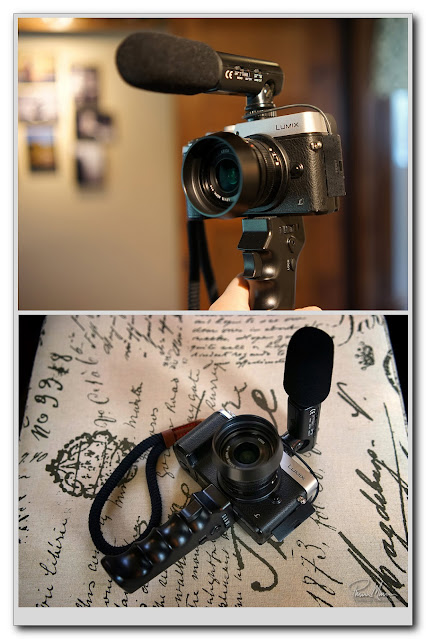
I chose to make things a bit easier for myself by switching cameras from my Fuji X30 that I used in earlier tests to a camera that is capable of shooting video in "Cine-like D". The older Fuji X30 doesn't have a flatter profile. It has nice contrasty images, which is great for images straight-out-of-the-camera but not so great for video footage when you want to do some editing. The "Cine-like D" profile on my Panasonic GX8 is a rather flat profile with a higher dynamic range which makes it easier to make color and contrast adjustments without having the file hit its limits or break apart. Shooting in this flatter color profile allowed me to more easily get the contrast and color the way I remember old Super 8 video footage to be.I also used a very high quality lens that I just picked up a few days ago. I purchased it used and got it at a very good price. This little Leica lens (pictured below) is outstanding but probably overkill for this Super 8 emulation purpose but it is the right focal length and produces incredible images and video. In my next tests, I plan to use a diffusion filter on the lens which should make the footage look even more film-like.
Once I loaded the video clips into my editing software, I moved the lead clip down onto the timeline. The next step was to get the color and contrast right. For Super 8 footage, I wanted a warmer profile with lifted shadows. I fine tuned this to my liking.
I then applied a "Film Damage" effect. Here I was able to add quite a few film camera effects within this one effect. The first thing I did was add a slightly warmer tint to the clip. I turned on the "Flicker" effect and toned that down to be barely perceptible. I added some "Shake" to resemble the film moving slightly behind the pressure plate as it records each clip. I wanted this effect to also be just barely noticeable enough to resemble Super 8 film movies. Then I added a bit of "Hair" on the film as well as "Scratches". Again, I kept these effects to a minimum and just barely noticeable.
I then applied a "Fast Film Glow" effect. This effect adds a bit of glow to the highlights which was common for Super 8 film.
Next was to apply a "Vignette" to resemble the smaller frame of Super 8 film as opposed to today's wide screen aspect ratios. I slightly blurred the edges of this frame and it looks pretty good compared to what I remember of home film movies.
Next up was to add "Film Grain". Not only does this effect add the grain that was common to all film stock, but it also dirtied the film a bit too. Of course, there are all sorts of adjustments to make with this effect but I think I got all the options adjusted well enough for it to come out well.
Then I added occasional light leaks. At first I added light leaks to all the clips throughout the entirety of each clip. Something about this bothered me but then I remembered that light leaks typically only occurred when the camera was pointed in certain directions so I cut back on the amount of light leaks. This is another sort of subtle effect but it really makes a big difference in emulating Super 8. With better film movie cameras, you wouldn't get any light leaks though so this is an effect that should be used sparingly and sometimes not at all.
Lastly, I decided that I wanted to keep the sound of nature that was recorded with my video clips (honestly... I didn't want to have to hunt down a background music track either) but I also wanted that old camera motor/projector sound. I added a this sound track to the background and dropped the level to a lower volume.
Once I had everything the way I liked, then I added the rest of the clips to the timeline and copy and pasted the keyframe attributes from the first edited clip over to each of the newly added clips.
So, the latest video is embedded below. I think it looks good! Of course, I'll continue to refine this process. Also, each clip will require different techniques especially when I run some tests indoors. For now, I'm liking the Super 8 film emulation I created here...


Comments
Post a Comment