Another Few Coats of Paint
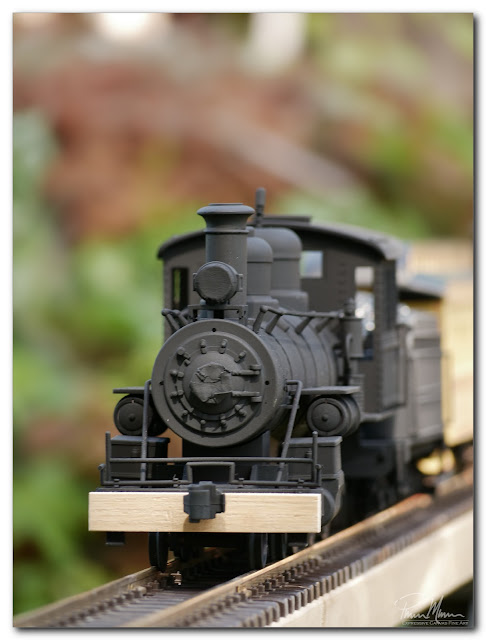
I've spent the past few days adding more coats of paint to my locomotive project. This is a large scale steam locomotive so it is a very large model and it is requiring a lot more paint than I expected. I've been delayed while waiting on paint to arrive (the USPS is dog-slow lately). Regardless of a few little problems, this project is slowly coming along.
A couple of days ago, I painted everything using Krylon Anvil Gray. I was hoping for a charcoal neutral color but this Anvil Gray turned out to be more closely resembling something I would call Midnight Blue. Midnight Blue was definitely not in my plan for this project so I had to order a different color (and wait a bit longer for it to finally arrive). I couldn't find a gray tone that I liked because they were all too light in tone so I settled for a flat black. I plan to weather this locomotive so starting with a neutral black will work even though my preference was for a neutral dark gray/charcoal. I was just hoping that I could start from a place of a toned-down black like a charcoal gray. I'll simply have to do a bit more weathering to tone down this solid black paint job.
I didn't remove any of the masking tape that I applied to some parts as seen in the photo below (the clear lens of the headlight and the number plate on the front of the locomotive). I still have more painting to do so I left the masking tape in place for these photos...
This locomotive was purchased as part of a set including a few freight cars and a loop of cheap track for only $40. I was never fond of this particular paint scheme and had planned to repaint this locomotive the moment I saw it for sale at that train show. My original plan was to repaint it and use it as a shelf display piece. That original paint scheme was too toy-like for my taste. This will still be used as a nice shelf display but I'm also converting it to Bluetooth control with battery power so it can operate smoothly on unpowered rail.
So, after my Anvil Gray fiasco with the paint appearing more like Midnight Blue, I repainted it an Ultra Flat Black. I really should purchase a double action airbrush and a small compressor so I could more easily mix my own paint to spray and have far more control over the flow of paint. For now, however, I'm using Krylon spray cans. For the detail work and weathering, I plan to use brushes with paints and powders but a good airbrush would make things far easier. When I'm finished detailing and weathering, I'll seal it with a matte finish (also Krylon).
I recently purchased a couple of used passenger cars on eBay at great too. One is the Observation car shown below and the other is a Combine (combination coach and baggage car). I placed the observation car on the track with the locomotive for these photos...
I definitely prefer this locomotive painted black rather than its original toy-like paint scheme of silver and red. I still have some more painting to do and then some weathering too before I seal it with a matte finish. I'm really liking what I'm seeing so far though... well... I wasn't at all happy with that Anvil Gray paint that looked more like Midnight Blue but I'm liking the black!
I'm actually still waiting on some parts to arrive... more paint, floor of the cab, dry transfer numbers and letters, battery packs, scale rope... but, in the meantime, there is plenty of other stuff to do while I wait on the USPS to deliver everything I've ordered online.


Comments
Post a Comment