Painting My Homebuilt Truss Bridge
As with most of my projects, I had thought that painting my homebuilt truss bridge would be a quick and easy job. It hasn't been difficult but it has not be the least bit quick.
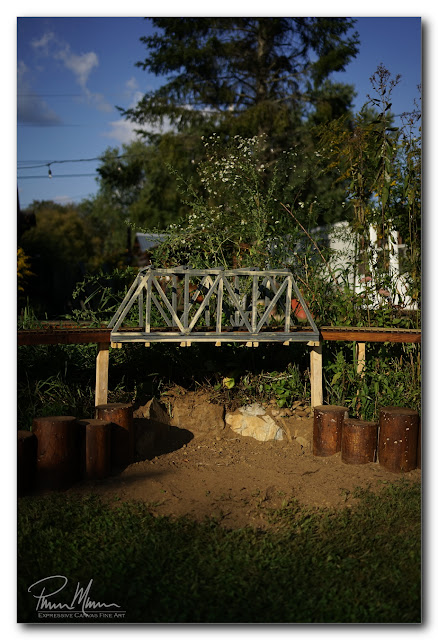
Oh yeah... as seen in the photo, below, earlier this morning I also dug out a valley under the bridge to provide a reason and purpose for this bridge. I removed some of the concrete test cylinders we are using as a border to open this valley to the lawn. (I had recently stained these test cylinders to improve their appearance and both Sheila and I are now a bit more open to having these hideous test cylinders in our landscaping.) After digging out some soil to level the area and to remove the vegetation, I used a bunch of rocks to build-up a wall holding back the upper part of the garden. I briefly thought about leaving it just like this but then chose to improve upon it by going one step further... I will put a small pond under this bridge.


This paint job is becoming a very long process.
First, I primed it with a spray can or two. Then I spray painted an Anvil Gray spray paint and it was far too blue. I wouldn't even call it a gray. It really was a very dark blackish-blue and I didn't care for the color at all. Once I started spraying this color, I realized that I had been fooled by the name of this color once before when I was painting my steam locomotive. It was far too blue for that project too and ended up wasting a few days while I searched for a more appropriate color.
Then I sprayed a can of something named Deep Gray. One would think this would be a gray that is into the darker shades of gray but, on the contrary, it was a rather light shade of gray. This paint also had an odd hue to it that seemed to be leaning into the blues. Simply put, this spray paint also did not look right to me.
Honestly, all the problems I've had in getting the right colors out of spray cans was making me think that I should have just left the bridge in natural wood... or stained it. I wanted to get away from this truss bridge appearing to be wood though so I felt painting it to resemble a metal girder bridge would be the way to go. I was having no luck whatsoever with spray cans though. Even for painting my trains, spray cans have proved to be very poor color choices.
At this point I also noticed that the three coats of paint I had already sprayed onto this bridge had raised the grain enough that it was affecting the appearance of this truss bridge. I decided it was time to do some sanding before I added more paint. Naturally, I ended up sanding off some of the coats of different colors in the roughest areas of the bridge.
Then I did more research. I looked at hundred of photos of truss bridges of all sorts of colors. Some bridges were a charcoal black. Some bridges were battleship gray. Some bridges were green. Some bridges were even blue. And, the hues of each of these colors varied greatly. What I wanted to choose as a color really came down to personal preference.
I decided I was envisioning a dull green. Not a bright green, not even a hunter green. I wanted something far less saturated but still in the green family. It didn't take long for me to realize that I simply needed to mix my own paint. There was no way I was going to get the shade of color I desire from a spray can. I really need to get myself a high quality airbrush. I've wasted far too much time and money on spray cans!
I always have craft paints on hand for modeling projects... ie, model railroading, dollhouses. Usually these projects are on the rather small side but this bridge is quite large so I was thinking I'd need about a pint of paint but most of my craft paints come in tiny bottles. I started mixing paints anyway in the hope that I would be able to mix enough of the right shade. I started mixing paints in my pint sized Ball jar so I could easily save leftover paint between coats.
I tested what I thought would be the right hue and shade on the bridge and let it dry. This mix turned out to be a green that was more saturated than I wanted. I mixed in more paints to tone down the saturation... some dark gray, some black, some umber... tried painting more of the bridge and let it dry. It was better but it still wasn't what I wanted.
Then I added more black and even some red... now it was looking good as a base coat for the final color.
I painted most of the bridge before realizing two things... First, the bridge was a bit warped and one of the sides was leaning inward. I suspect that nobody would notice this but it was driving the perfectionist in me crazy so I knew I needed to minimize this warping and try to level it a bit. Before I continued painting, it was time for a bit of work on the table saw and to add some strengthening girders to counter the warping.
Also, I realized that I should be checking the hue and shade under the bright daylight of the sun so I brought the bridge out to the garden layout and set it up in place. After looking at it from different angles out in the sun, I decided this version of the mixed paint was a good shade for the final base coat. I'd still want to add some texture and depth to the paint job in the form of light weathering but this base coat would work. I know that the weathering I planned to do would lighten up the color significantly.
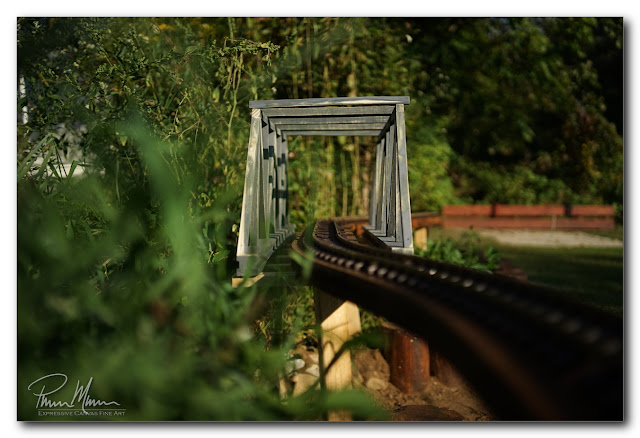
Below are a couple of photos from yesterday after I sanded some of the rough spots of raised grain. As I sanded, lighter colors of previous coats of paint were exposed. In some places, I sanded down to bare wood! Sanding these rough patches created a sort of distressed look. Although this isn't what I was envisioning, even this unfinished distressed look is far better than the funky shades of paint straight from the spray cans.
In this photo, below, you can see that the bridge is slightly misshapen. The end of the bridge closest to the camera on the the right side is taller than the left side. Additionally, the left side is leaning inward. Although not visible in these photos, both sides are warped, one side far worse than the other. I was able to fix most of this today on my tablesaw.


I am now waiting on materials to make a model pond. I tossed around ideas for a real tiny pond with real water but that was too complicated for this little garden railroad. I decided the best option is to make a model pond just like I would on an indoor model railroad. When I bring out the few buildings I plan to make for this garden railroad, I'll also bring out the model pond and place it under the bridge.
Pond or not, the bridge is now spanning over a little valley and it looks good.
I had hoped to have the bridge completed by today but that never happened. I've been struggling with holding back puke since around 11pm last night so the work on the bridge today was very slow-going. Then I had the paint hue issues which ate up hours spent repainting and repainting again. Then I had the warping issues. Needless to say, it was a slow but busy day between all the diversions related to this project and many trips in and out of the bathroom so I never finished painting this bridge. Feeling quite miserable through all of this wasn't all that pleasant either!
Hopefully the nausea and holding back puke will be behind me by tomorrow so I can finish painting and weathering this interesting truss bridge.
(Note: We met with Sheila's family last weekend in Portsmouth for a burial at sea... it seems that everyone is sick this week. We've all continually tested negative for COVID so it's possible we have some other virus although with widely differing symptoms. At the moment, I'm struggling with holding back puke and spending a lot of time in the bathroom so it is amazing that I accomplished anything.)
_______________________________________________________
UPDATE: September 15, 2024 - As I mentioned in the above blog entry, I decided that mixing my own paint was the way to go since I was not at all happy with any colors from spray cans. So, I spent yesterday and a good part of today painting the custom built truss bridge with various shades of green.
Now, this is closer to what I had envisioned when I started designing this bridge!


I still need to do a bit of light weathering to add some depth to this bridge but I really like the way it is looking at this point. I need to add some whitish/gray dirt on the lower half of the bridge as well as some rust... maybe I'll add a bit of dark grime in places too.
I plan to keep this weathering very light so that it just adds a bit of realism and depth to the finished bridge. It is really looking good at this point though!
Comments
Post a Comment