Posts

Showing posts with the label solar

Giant Prominence and Spicules

Image
M any  nights before heading to bed, I continue to try to refine my workflow for processing my solar imagery data.  I'm definitely beginning to understand what needs to be done in this process because I feel my resulting images are getting better and better.  This photo, below, is a photo I compiled and processed from data collected just a couple of days ago on July 31st.   I've found that when I black out the disk/sphere of the sun, everything on the limb of the sun really stands out.  The fine hair-like spicules of red-hot plasma are clearly visible all along the limb.  In this particular shot, there is a rather large prominence too which really is the main subject here.  This is red glowing plasma consisting of hydrogen and helium.  This prominence is flowing and looping along magnetic fields about 24,000 miles into the corona from in front of the limb to back behind the limb in this photo.  Generally speaking, prominences can flow and loop into the corona upwards of tens of

A Little More Solar Observing

Image
I am still feeling rather lousy and lacking energy so I didn't think it would be wise to do much today.  My plan was to lay low and recover.  I want this virus behind me...  once again!  (Perhaps the third time is the charm.)   The lawn is in need of mowing but I have been putting that off for the past few days in an attempt to recover.  This morning was a fairly clear day outside though so I mustered up the energy to drag one of my telescopes outside to do some solar observing again for a short while.  This wouldn't require nearly as much energy as mowing the lawn or any other project that needs to be done so solar observing was the thing to do this morning. This time I grabbed my longest telescope so I could do some closeup observing. I haven't used this telescope in a while.  This telescope is fairly long at 1000mm.  When we combine that with the internal Barlow lens of the Quark Chromosphere hydrogen alpha solar filter I was using, that put my total focal length at 420

Solar Filter Spacing

Image
M y little project for yesterday morning was to get the spacing adjusted correctly so I can capture the complete full disk of the sun including any prominences that may be extending from the limb in Hydrogen Alpha (Ha) with my current telescope and camera.  This little project was actually a tedious process of trial and error but I succeeded as seen in the photo (at right).   In hindsight, I should have set up my new mount for this project so I didn't have to constantly spend time tracking the sun manually.  Instead, I used a lightweight manual mount that has no slow motion controls because I am still quite sick with either COVID or a bad respiratory cold.  Setting up the new mount would have required more energy than I have right now so I opted for a much smaller mount.  Unfortunately, this smaller mount made this project a bit more tedious than it needs to be.  I was constantly nudging the telescope to keep it in my field of view as the sun slowly moved across the sky.  If I used

Solar Imaging This Time

Image
I had previously written about a morning of solar observing .  This time, I am going to write about a morning of solar imaging . I was excited to do some imaging because my previous morning of observing-only was exceptional.  The atmospheric conditions (astronomical "seeing" as it is rather unscientifically and rather ridiculously called by the astronomy community) were well above average when I was observing the previous day.  Those kinds of seeing conditions are rare so I was hoping that this morning of imaging would have skies that were just as good.  Sometimes good seeing lasts only an hour, other times it will last for a couple of days.  It was clear on this morning, there was a deep blue sky, and the weather was beautiful.  Above average seeing conditions would be awesome for imaging.   After about a half hour of setup time, running in and out of the house collecting the necessary gear and assembling it all, I was ready to fire up the computer and point the telescope to

A Morning of Solar Observing

Image
I've been overwhelmingly exhausted this past week so I really haven't been doing much other than sleeping, eating and using the bathroom.  This morning, however, we had an unusually clear, sunny sky so I decided to do some solar observing with a couple of telescopes.  I felt that I had enough energy in me to drag a couple of telescopes out of the house for a simple observing session so that is what I did.   I had quickly decided to just make this an observing session only though.  To do a "proper" imaging session would require far more equipment including a computer and associated cables and thus would require far more energy.  This was energy I still didn't have just yet.  Honestly, I was still feeling as though I could sleep for another week before diving into anything too taxing.  My plan was to just observe the sun for about an hour or so while saving enough energy to then put everything back in storage.  (It turns out that I did not have enough energy to prop

Sol Searcher

Image
I had previously written about having problems finding the sun with my telescope while using a finder scope called the Sol Searcher.  I resorted to removing the Sol Searcher and going back to using my homemade solar finder scope instead.  My homemade solar finder scope works very well (pictured at right with the bullseye on the back end of it) but, when I'm using more than one telescope for solar astronomy, it is best to have a finder scope for each telescope.  I was hoping this little, lightweight Sol Searcher finder scope would be the ideal solution but I was quite disappointed until the other day.   When viewing the sun, your body is situated at the rear end of the telescope where the eyepiece is located.  You would naturally want to also view the solar finder scope from this position as well and that is what I was doing.  The problem is that when you are back behind the Sol Searcher finder scope, you cannot see where the sun is on the Sol Searcher until you are dead center pos

Portable Solar Power

Image
M y newest solar filter requires a power supply.  It came with a cable and an AC adapter but, until I have built my observatory (hopefully this spring/summer), it is far easier to use a portable power supply.  Besides, the sun is behind trees all winter from where the observatory will be located so, depending on the time of day, I need to set up the telescope in a different location and I sometimes need to move the telescope as the sun moves behind more trees.  Portable power is an easier solution for this. The manufacturer offers a solar powered battery to use for this but the price seemed a bit high.  This filter is a bit of a power hog so it does need to be a relatively powerful battery.  That solar powered battery idea seemed like a great idea for powering a solar filter though.  This prompted me to look around online to see if I can find a more reasonably priced solar battery with the same specifications or better.   In the meantime, we have a portable charger that we use for char

A Beautiful Afternoon for Solar Astronomy

Image
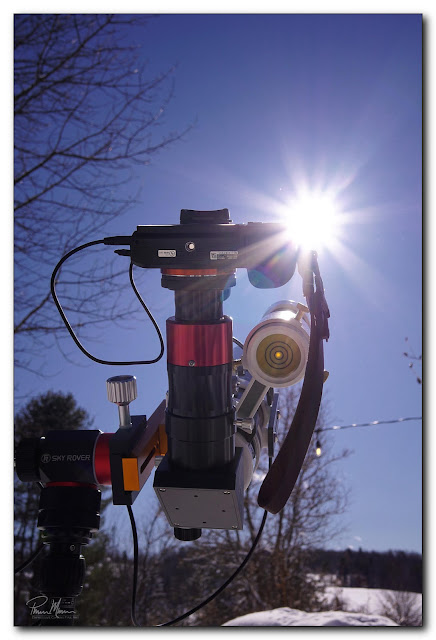
Y esterday afternoon was a little chilly but a beautiful afternoon for solar astronomy.  The sky was a deep blue, the distant mountaintops were crisp with no haze diminishing my view, and the temperature was a balmy 20° or so.  It was a great opportunity to spend a little more time with this new solar filter. I set up everything indoors and then moved everything to our mudroom/laundry room at the back door to make it easier moving everything outdoors.  I knew I wanted to attempt to capture some photos so I also had two cameras ready as well as a few lens choices.   You can clearly see in this first photo that it was a beautiful afternoon.  I don't think I've seen skies this clear in years! I was able to set up the telescope in an area where I had cleared snow the previous night.  This area of the backyard is very near our outdoor kitchen and the back door to the house so I had easy access to any additional equipment I might need from indoors.   Although it was a relatively mode

An Aperture Mask

Image
I was evaluating a new solar filter on two separate mornings over the past week.  The views weren't as good as they could be.  These views were brighter than necessary and my research was indicating that reducing the aperture of the telescope might produce better results.  In particular, I was hoping to find a way to see more detail on the surface of the sun's chromosphere.  I always have some scrap lumber lying around so I went looking for a small scrap of 1/4" plywood.  I could cut a hole of the correct size and then cut out the outside diameter.  This would then fit inside the dew shield on my telescope.  The inside hole would provide the new, smaller aperture for the telescope. In this case, my intention was to cut a 60mm hole.  Unfortunately, the drill bit walked a bit when cutting so I screwed up the hole slightly.  Fortunately, I managed to salvage the project by making the hole a 63mm diameter hole instead.  This would change my f5.8 telescope to an f6.67 telescop

White Light Solar Imaging

Image
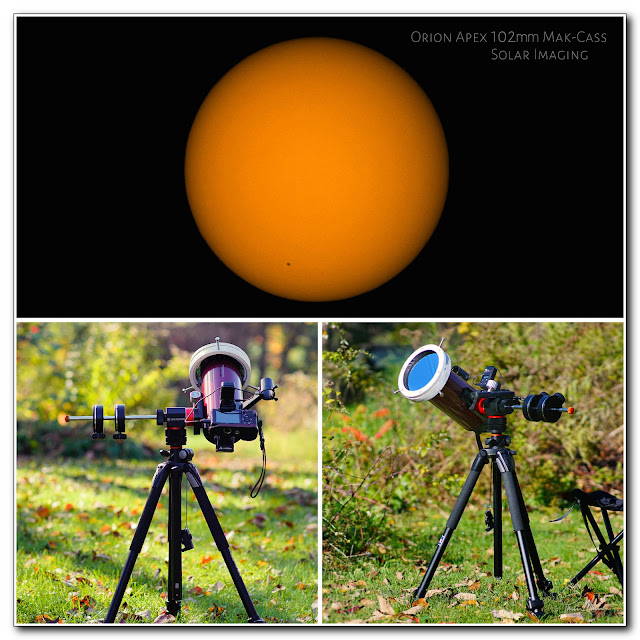
I had previously written about solar imaging in Calcium K (CaK).  In that imaging session, I had used one of my usual nice little refractor telescopes (Skywatcher ED 72mm refractor).  This time I am revisiting an imaging session done in white light when I used a really lousy little Maksutov-Cassegrain telescope.  This telescope is the Orion Apex 102mm Maksutov-Cassegrain (uggg...  I really hate a lot of characteristics of all reflector telescopes and this tiny little guy is no exception) .   Seriously, I do not like this little telescope at all.  I was told that a Mak-Cass would be "razor-sharp" yet this Mak-Cass does not provide a crisp image when compared to any of my refractor telescopes...  not even when compared to my sub-$100 70mm achromatic telescope.  It occasionally needs to be tediously collimated so that the mirrors are perfectly aligned otherwise the views are even significantly worse.  Collimating a Mak-Cass is tedious and difficult.  It requires a temperature

Solar Imaging

Image
W ith the frigid temperatures outside being down in the single digits and sub-zero range everyday, I've been trying to keep busy indoors.  Of course, by saying "I've been trying to keep busy" I am referring to keeping busy in the little bit of spare time I have between health issues, daily physical therapy, daily piano practice, and down time.  Still, I like to accomplish something and learn something each day regardless of whether it is a good health day or bad health day.   The windy frigid temperatures have kept me indoors.  I don't even like going outside to get the mail in this weather so Sheila does that most days!  As I've written in this blog often, my health fares quite poorly in warmer environments (in the 80s and above) but I've been very sensitive to cold environments also as I approach 60 years old (in a few months, in case anyone wants to know).  I simply have zero tolerance for cold environments now.  (Watching the grandkids at the ice rink

Solar Observing

Image
A few days ago, while still recovering from mast cell symptoms, the sun had peaked through the clouds so I grabbed a lightweight telescope with a solar filter and headed outside.   I wasn't feeling well enough to do any solar imaging (that can get complicated and involves a lot more gear...  as well as a clear head) so I just grabbed one of my lightest scopes which happens to be my lowest quality scope too.  Even though this was my lowest quality scope, I knew it would be good enough for a few quick views of the sun.  Besides, it was still mostly cloudy and the sun was just peaking out in between clouds.  I knew the solar observing would be short-lived on this day so it would have been a waste to use up energy on my better, heavier and bulkier astronomy gear. The moment I peered through the telescope, I realized that the sky conditions were lousy too.  I hadn't noticed it before but it was hazy and the sun was veiled in thin clouds that I could see passing in front of the sun. 

Another Homemade Solar Filter

Image
Back a year or so ago, I built a wood frame solar filter for one of my larger telescopes and, if interested, you can  read about it here.   This is another blog entry about a new homemade solar filter that I made about a month ago to be used, mostly, for testing purposes but it never hurts to have multiple ways to view the sky, daytime or nighttime.   I decided to build this solar filter for two reasons.... 1) I already had the supplies so it wouldn't cost me anything, and, 2) I want to compare one of my Spectrum glass solar filters to this new solar film filter I made as well as compare it to my solar wedge as a comparison between the three types of solar filters.   To make this comparison as accurate as possible and to keep as many scientific controls as possible in this little test, I decided that I should use the same telescope and the same camera so the only significant variable in this test would be the filter itself.  My small Skywatcher ED 72mm refractor was the best option