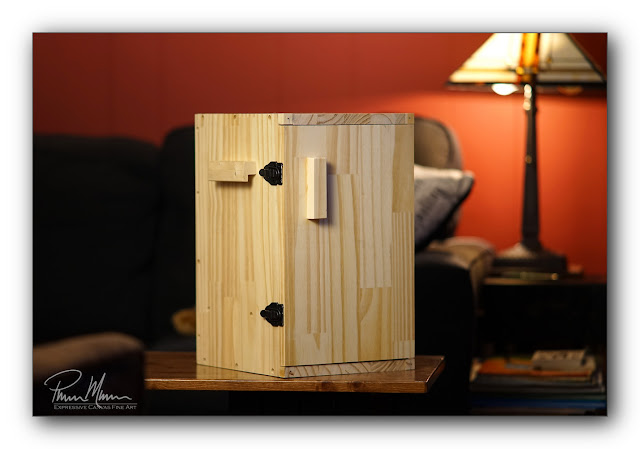
Posts

Locking Clutches

Image
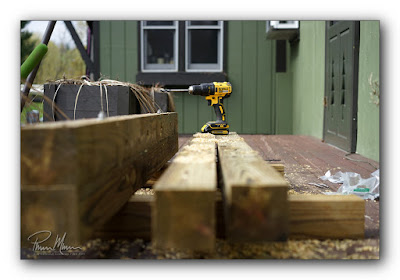
I made a little more progress on my homemade telescope mounts this morning.  I decided to drill and tap each of the axes on each of these mounts so I can add a clutch of sorts to each axis.   In this first photo, you can see both locking clutches on the equatorial mount.  I drilled and tapped 1/4-20 holes on the edge of each axis.  I can now add some friction to each axis or I can even lock down an axis.   This next photo shows the three locking clutches on the dual telescope altitude-azimuth mount.  Now I can control how much friction is applied to each of the axes.   Although it appears as though the 1/4-20 locking clutch makes direct contact with the threads on the axis, it does not.  I have some heavy leather inside the hole I drilled so the leather is pressed down on the threads of the axis.  This will protect the threads while applying enough pressure to have a useful clutch.  If we had metal on metal, then the threads would quickly be ground down by the metal on meta

Woodworking to Metal Work

Image
I started off my day yesterday doing some woodworking.  I had previously designed a microscope case and had assembled most of it already a few days ago.  I needed to add a door and some handles yesterday. Unfortunately, I'm a bit out of practice with my woodworking skills so I found cutting and assembling this wood was rough and a bit frustrating due to making some really stupid mistakes which cost me some good lumber.  In the end, the case is looking good assembled though.   I still need to add some medium density foam to three areas on the inside of this case to keep the microscope from touching hard wood surfaces.  I'm happy with the design of this case though.  I still need to add hardwood plugs to cover the screw holes and then stain and finish the outside of the case.  The interior will remain unfinished.   One area where I had some difficulty in the design of this case was how to fasten the door closed.  I opted for two of these basic buckle fasteners. 

Some Photos in Honor of Memorial Day

Image
As most everyone who follows this blog knows, we recently traveled across the country by rail.  While we were in San Francisco, we stayed on an old Army post named The Presidio where I felt more at home than I have since retiring (more on that later in another blog entry) .  There were many interesting sites to see on this old post including many spectacular and scenic views.  On our last day residing on this beautiful, scenic, historic and memorable property, we spent a good portion of the day visiting the National Cemetery which is located within The Presidio grounds.  As anyone would imagine, anytime we visit a veteran's cemetery or National Cemetery, I'm vividly reminded of my Air Force Honor Guard days.  As a team chief, I managed and conducted more than 300 funerals during my three year tour.  I could write a book solely on my experiences with this outstanding team of men and women and many of these colorful yet somber memories flashed through my mind while strolling th

A Telescope Pier

Image
I'm in the process of building a few little (relatively little) things outdoors as the weather and my health allows...  which means, over the course of only a few hours a week...  but at least things are progressing.  I am making some headway so that is good.  One of the things I'm building is a small fenced area in our yard where I can do some astronomy.  Last summer we had too many bears freely roaming around our neighborhood for me to feel safe out there alone in the pitch darkness.  This year, I'm enclosing myself inside a small fenced area that includes a shed.   Rather than constantly lugging a tripod from indoors to the outdoors and then lugging it back indoors again, I decided to build a pier within this fenced area.  I will be able to mount any of my telescope mounts on this pier, electronic or manual, without the use of a heavy-duty tripod.  Having a permanent pier outdoors will give my spinal injuries a little bit of a break.   The pier, itself, is q

Astronomy Gear Upgrades

Image
I recently picked up a relatively inexpensive larger telescope to help improve my views of the sun.  I say "relatively inexpensive" because a little, cheap camera lens would cost more than this telescope cost.  This new telescope is significantly larger than my previous "large" telescope which should help to see more detail on the surface of the sun...  when and if the skies here ever allow for crisper viewing! Although this telescope is larger, the optical glass in the telescope is not nearly as good as the glass in my other telescopes.  For relatively narrowband viewing of the sun, however, this should not matter.  Since the glass in this telescope isn't "perfect" (to simplify things), it is considered more of a low-end telescope.   When this telescope arrived, I needed to replace the stock focuser.  Most low-end telescopes only come with a single speed focuser, however, it is far easier to focus fine detail when you have a dual speed focuser.

A Solar Diversion

Image
I'm finally beginning to feel "halfway" decent lately which is a tremendous change in my health since September of last year so I'm now trying to catch up on little (and big) projects that need to be accomplished around the house.  I've done some raking outside on a rare sunny day...  I've replaced a leaky bathroom faucet...  I've replaced our locksets and deadbolts...  I installed all the window screens around the house...  I've rebuilt and restored an older computer to use for astronomy...  I installed a new focuser on a fairly large telescope...  I've tuned up and adjusted my largest telescope mount...  then, yesterday morning, when I saw that we had a sunny day with some decent visibility, I had to pull out my newest telescope to view the sun! Decent visibility is a rarity these days and it significantly impacts viewing the sky, day or night, with a telescope.  This is why NASA prefers to launch their telescopes into space to view from there

Telescope Eyepiece Quality

Image
Kit eyepiece, far left, with three upgrades to the right. I feel as though I'm always trying to persuade newcomers to astronomy about the importance of purchasing something better than the kit telescope eyepieces that come with most new telescopes.  My advice, however, usually seems to fall on deaf ears until, that is, the new telescope owner eventually gets to peer through a better eyepiece with their own eyes.  Then they are flabbergasted with mixed emotion, saying, "Wow...  I can't believe the difference!" as they smack their forehead with the palm of their hand instantly realizing all the time they wasted while dragging their feet about purchasing new, better eyepieces. You see, these eyepieces that come packaged with new telescopes, generally speaking, are tiny, difficult to see through and less-than-sharp junk that border on useless.  I recently realized that if I write about this and show some photos,  at least   these people would be able to see the