Tips for Bird Photography
As I thought about all of these tips and how each of these tips manages to play upon and affect other aspects of bird photography while, at the same time, are transferable to wildlife photography in general, I knew that putting all this knowledge in writing would help to sort and organize everything in my head. Hopefully, others whom have been struggling to capture some nice bird photos (like I had been for years) may find at least some of this information useful enough to help improve their bird and wildlife photography.
First and foremost, let me point out that I am not a professional wildlife photographer. Photography is definitely a hobby for me. Photography is also a form of art therapy for me as a struggle with serious chronic health illness and injuries.
I should also point out that I really do not purposely go out specifically seeking birds to photograph because, to be honest, birds sort of annoy me! The art of capturing a good image of these small, flittering birds does interest me though.
If I happen to come across a loon on a lake... or some type of waterfowl... or see a hawk or eagle overhead... I pull my camera out from under the front deck of my kayak and try to capture a few images. The problem is that most of these attempts at this type of photography have left me frustrated. Something wasn't right and I needed to figure it out.
Until recently, quite honestly, my results have been mediocre, at best, so my advice written here is simply that... my advice based upon my experiences. I still have a lot to learn and my photography gear like all photography gear has limits but, regardless, every shoot is a new learning experience for this hobbyist photographer who is trying to get the most out of his photography gear and skills.
Next, I want to point out that education and effective practice are the best tips anyone could give to get the most from any activity and wildlife photography is no different.
Better tools certainly help and the best tools can sometimes do wonders but who has the money for $50,000+ in photography gear to learn how to utilize these best tools? I know I don't! Life is about compromises and I have found an acceptable compromise here for my bird and wildlife photography. What is considered "acceptable" to me, may not be acceptable to you. Although the tools do matter especially when we are talking about a specialized type of photography, remember that the photographer's knowledge, skills and abilities matter just as much, perhaps even more in many ways.
Shooting wildlife and especially fast-moving little birds is a skill which requires a lot of practice, a lot of patience, and the appropriate equipment. Personally, I've been struggling with this type of photography for years and was constantly frustrated by my results. Recently, however, after having persevered in learning all I can, I've found that I have finally improved to a point where I find myself satisfied with my resulting photographs.
As an example of my level of bird photography as of this writing, see this post.
Before I get into the deeper details of these tips, let me simply state the five things that I find the most important after having struggled for so long:
1. My first problem was not having the right gear for this type of photography (ie, the best lenses for the right camera bodies). You don't use a child's plastic hammer to frame a house, do you? Get the right tools for the job.
2. My next problem was not keeping my shutter speed fast enough. Shutter speeds must be fast enough to freeze all this fast action.
3. My third problem was not getting close enough to the action, sitting still and being patient.
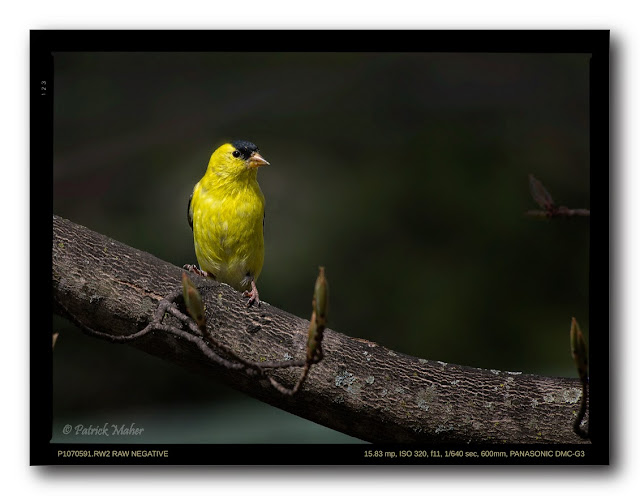
4. My fourth problem... I found that in order to get the absolute most detail in photos of these finely feathered friends, you must shoot in your camera's RAW format because this file format retains more detail without degrading image quality due to jpeg file compression. Every little bit of increased image quality helps your final product and eliminating jpeg compression typically provides a noticeable improvement in fine detail such as feathers.
5. And lastly, but certainly not the least of the skills and tips required for beautiful bird photography, you must know how to digitally "develop" your resulting RAW files effectively. In other words, you must learn how to effectively post-process your images with photo editing software designed specifically for this purpose (this alone could take months or years of dedicated learning and effective practice). Keep in mind that this does not "fix" a bad photograph... it simply enhances and brings out the details of a good photograph.
Even if you don't read the rest of this blog post, these five tips I just quickly mentioned above are crucial and will have an extraordinary positive impact on your final images. Now let's get into all the tips. Each of these tips will be a piece of the big puzzle in how to get impressive photos of birds.
The Camera
This first tip is a no-brainer but worth mentioning anyway. A newer camera body will provide certain advantages over an older model. Additionally, some cameras are better than others for various types of photography.
The main reasons for a newer, better camera are for better resolution, better low light capabilities, faster processing speed and improved autofocus. The better your tools (and knowing how to effectively use those tools), the better your chances are at a better final product.
One of my own difficulties with this type of photography until very recently stemmed from struggling too long with a poor camera body. Since the first day I started using that particular camera body, I struggled to capture crisp images of distant objects. Even stationary distant objects such as mountains were always blurred a bit! I actually spent years trying to resolve the problem and working on technique all to no avail. It wasn't until I purchased a new camera body that I realized the problem was not me... the problem was that crappy Olympus E-620 dSLR body! Even though I learned a lot about digital photography, in general, while using this camera, I truly felt like crying when I realized that I had wasted perhaps thousands of hours over the course of years in trying to overcome this problem with clarity, focus and sharpness.
I had recently acquired an incredible Sony camera system which I have to say is, by far, the best camera I have ever used or even imagined. The first time I used this Sony camera, I immediately saw an improvement in my final product... amazing clarity and crispness... sharp photos (although, even when friends use this camera to shoot a quick photo of me, it is usually blurred... that isn't the camera's fault... it is the result of people not understanding how to hold a camera and how to shoot a photo while keeping the camera steady... so, no matter how good the camera, technique is very important)... beautiful tonal qualities... and ease of use (now that I knew all the ins and outs of exposure, light and photography while also having decades of experience with widely varying cameras). To this day, this is my absolute favorite camera system for portraits/people photography and even landscape photography. It simply is leaps-and-bounds better than anything I have ever used before. Unfortunately, this is not the camera system to use for long telephoto photography.
If this camera system had the appropriate lenses available to use for wildlife and bird photography, I'm sure I would be using it for this purpose as well. Unfortunately, this is not the case which leaves me evaluating other options for wildlife and bird photography.
(EDIT: In late 2016, I purchased a few super-telephoto lenses to adapt for use on my Sony camera. These purchases (used lenses) vastly improved my photography and has allowed me to pair great lenses with a great camera body. Within a very short time, Sony also started producing high quality telephoto lenses which are definitely great tools for wildlife and sports shooting. Sony is a very full system today with a great selection of lenses as well as class-leading auto-focus.)
At this point, I know enough about photography and have refined my technique enough that I understand that I need to find appropriate photography gear for all my long telephoto needs. That Olympus E-620 was the weak link in my photographic process and that weak link was frustratingly limiting. That weak link is now gone!
The fact is, very few people are set up properly for long telephoto photography. Technique is exceptionally important... understanding and knowledge of photography principles is exceptionally important... and, having the right gear is also exceptionally important for this very specialized type of photography.
In order to get the "right gear", there are a few directions you could go here:
a) If you already own a camera body which provides you with good, sharp, crisp results, with acceptable autofocus capabilities, you can just buy a more appropriate long lens in the 400-600mm field of view range. Depending upon your choice of lens, this could cost anywhere from $200 to $35,000+! Realistically speaking, for acceptable quality (my personal standards) and effective focal length, the prices really begin around the $800 mark so plan on spending between $800-1500 on a new lens or a bit less for a used lens.
b) If you know you need to replace your camera body because it simply is not up to this detailed, demanding and fast-moving task, then I recommend looking at a dedicated system strictly for long telephoto. One option is to first find a good used long telephoto lens with high ratings (search lens reviews online for the long lenses you see for sale) and then find a good used camera body with the same mount as the lens. The newer the camera body model, the better. You can then use this combo strictly for your long telephoto needs.
c) You can purchase a complete new camera system which would be more appropriate for longer focal lengths. Personally, if you decide to go with this option, at an absolutely minimum, I would recommend the Micro Four Thirds camera system. This system is incredibly small, lightweight, provides fast autofocus, and has some long lenses which reach into the 400-600mm equivalent field of view range. Lenses with this sort of focal range are necessary for this type of photography.
d) If all this talk about different lenses and camera bodies is a bit daunting or intimidating, you can purchase an all-in-one superzoom 'bridge' camera with a respectable-sized sensor in it. These bridge cameras are named as such because they "bridge" the gap between compact cameras and an interchangeable lens system while retaining some features from both worlds.
Bridge cameras are like compact cameras in that they have a quality lens with a good focal range permanently affixed to it. One advantage here is that because of the long lens affixed permanently to the camera, there is no messing around with different lenses, no need to learn about the market of lens choices, and no need to deal with dust and dirt getting into your camera body every time you change lenses. Where bridge cameras differ from lower end compact cameras (and virtually useless cellphones) is that you, the photographer, have full control of your camera with manually adjustable settings while still retaining some automatic features, if desired.
If this sounds like a more desirable option, then I highly recommend the Panasonic FZ1000 (Panasonic Lumix DMC-FZ1000 website... or the newer FZ2000... or the Sony RX10 III). This beautiful little camera has an impressive sensor that is larger than what is found in most superzoom cameras. This relatively large sensor (1", which is large for a superzoom bridge camera) camera has proven itself as a sure winner. (Here is an example photo album of birds shot with this camera.)
Note: Since I am providing some advice here, I feel I must add this... I do not recommend any of the superzoom cameras with tiny sensors (smaller than 1")... My opinion is that those cameras with tiny sensors should be avoided at all cost. As of this writing, I can only recommend the Panasonic FZ1000 or the newer FZ2000 or the Sony RX10 III in the bridge camera category... and I highly recommend one of these cameras for anyone looking for a good camera with a permanently affixed lens whether shooting wildlife or not. (If you choose this camera option, you can skip over the "Lenses" section below.)
Camera Features
When looking for a camera to use for wildlife photography, features to consider are sensor size, resolution, low light capabilities and autofocus capabilities to include the effectiveness of these autofocus capabilities.
First off... Generally speaking, a larger sensor will capture far better photos than a smaller sensor. Most people probably think I am referring to the mexapixel count so, let me be crystal clear... I'm not talking about megapixels when I refer to sensor size! Contrary to what most people may think, the amount of megapixels advertised by the marketing folks at a camera company has absolutely nothing to do with the size of the sensor or even the quality of the sensor. I am talking about the physical size of the imaging sensor. (See the diagram at the right.)
Generally speaking, larger sensors produce better tonal qualities, better dynamic range, more clarity and help in separating your subject from your background. For the best image quality, get the largest sensor you can afford (to include lenses designed specifically for that sensor size because lenses always end up being the biggest cost factor... the bigger the lens, the higher the cost... the better the lens, the higher the cost).
Now, let's talk about megapixel counts. This is the number of pixels on your particular sensor. Each photo is made up of tiny dot/pixels of light. The advantage to having more pixels on your sensor is it gives you more pixels to play with when it comes to cropping your images. Conversely, having too many pixels squeezed onto a tiny sensor may actually degrade image quality, not improve image quality. There is a happy middle ground depending upon where technology is at any moment in time. Again, generally speaking, sensor size should be considered first and then you might want to take a look at the number of megapixels packed into that sensor.
Assuming you are using a camera with a good sensor, increased resolution (megapixels) means you can crop farther into your photos. You must really be careful with the cropping, however, because this really degrades image quality quickly if you crop too aggressively. I see this problem far too often in people sharing all sorts of photos on Facebook but especially bird and wildlife photos... the over-cropped photo becomes very pixelated, washed out, noisy, hazy, and generally looks lousy because it was cropped far too drastically. All that being said, the more good pixels you have, the more you can crop, to a point.
Even though you will probably be shooting your wildlife photos in the daytime, the low light capabilities of your camera are extremely important. Even in good light (bright sunlight), I find myself shooting in the ISO 200 to ISO 400 range in order to keep my shutter speed fast enough to capture crisp photos. Needless to say, in less-than-ideal light, the ISO must be bumped considerably higher in order to keep the shutter speed fast enough for these flittering, fluttering birds.
Some cameras produce very grainy, fuzzy, noisy images above ISO 400... some cameras have no problems with this type of image degradation until above ISO 1600 or 3200. Some newer cameras with larger sensors can capture beautiful, clean images up into the ISO 6400 range. The better your camera is with low light, the easier it will be to keep those shutter speeds fast enough (which is needed for crisp photos). Again, generally speaking, newer cameras are better at this than older cameras.
The next advantage of a newer camera body is gaining a better, more efficient autofocus system. Newer cameras typically sport faster autofocus systems covering the entire frame with more accurate autofocus tracking abilities. Wildlife photography is about waiting for the right moment. When that moment arrives, however, there is a flurry of activity within mere seconds so you need to have the ability to focus quickly and track your subject effectively. Newer cameras are much better at this than older cameras and some cameras are better than others.
You must find a camera body which works best for you and your budget based upon the above information as a guide.

Lenses
Lens selection is exceptionally important. I have found that you need to be able to reach into the 400-600mm range (full frame field of view equivalent) for wildlife photography. This means that if you are using an APS-C size sensor which has a 1.5x focal length crop factor (ie, entry-level or mid-level Canon, Nikon, Fuji, Sony, Pentax), then you would need a lens with a focal length in the 300-400mm range which would give you a full frame field of view of 450-600mm (300mm x 1.5 = 450mm and 400mm x 1.5 = 600mm).
A happy medium between large sensors and small compact camera sensors is the Micro Four Thirds format which uses four-thirds size sensors which have a 2x focal length crop factor. This 2x focal length crop factor is great for getting even longer focal lengths while still retaining a fairly high level of image quality from the medium sized four-thirds sensor. So, Micro Four Thirds lenses with a focal length of only 300mm will actually give me a field of view equivalent of 600mm (300mm x 2 = 600mm)... and yet this camera and lens combo is relatively small and relatively lightweight.
Get the best lens you can afford. The better the quality of the lens, the better your images will be. A high quality lens will provide clarity, sharpness, nice micro contrast, with little-to-no distortion nor aberrations. Quite simply, high quality lenses cost more money. Would you prefer to be looking through scratched, hazy sunglasses or crystal clear, sharp sunglasses? Seek the best glass you can afford.
A cheaply made, low quality lens will have all sort of chromatic aberrations, it will lack contrast, and will be lacking clarity and sharpness. You might as well be looking through the bottom of a Coke bottle! Check online lens review websites to research the quality of specific lenses before you purchase a lens. Compare reviews and compare lens test results.
The "faster" lenses with larger apertures (which makes for larger and much more expensive lenses) give you two advantages. First, you can shoot at higher shutter speeds when you open up that aperture... and second, you can more easily separate your subject from a blurred background to help minimize distracting background clutter. These features come at a premium price, however, and these faster lenses are extremely large... in many cases, too large to keep steady while shooting without a tripod or monopod.
To sum up... The best lenses have the ability to capture sharper, crisper images with beautiful tonal qualities and micro contrast while minimizing distortion and chromatic aberrations. For the most part, you get what you pay for when it comes to lenses.

Technique
Keep your shutter speeds fast while still getting the correct exposure. You'll definitely want a properly exposed image without overexposing the highlights. If you blow out the highlights, you will see only empty white space where highlight detail should be (ie, if you overexpose a white bird, you will lose all detail in the white and you will have no feather detail or depth, or you could overexpose a sky leaving you with a flat white sky instead of a detailed sky).
In order to keep images crisp, once you understand light and exposure, the general rule of thumb is to shoot a shutter speed that is 1/focal length. So, if you are shooting a longer telephoto lens at a 600mm equivalent field of view (which is the length I shoot quite often), then you need a shutter speed of at least 1/600th second. I find that I get sharper results at closer to double that speed. At 600mm, I actually prefer to shoot in the 1/1000 to 1/1250th second range but will drop the shutter speed down to 1/600th second in some circumstances when I can rest the camera and lens on something stationary.
Now, let's talk about lens stabilization... or sometimes referred to as IS (image stabilization). This feature is great for minimizing camera shake. When the shutter speeds are slow it is more critical to keep that camera rock steady. Good IS can help to minimize the effects of camera shake at long focal lengths. Unfortunately, when shooting birds, the biggest problem which causes blurring is due to the birds moving so quickly and IS will do absolutely nothing to help with this problem. IS only helps minimize camera shake due to poor handling by the photographer. If your subject moves while using a slower shutter speed, you get motion blurring regardless of IS or not.
The way to counter the fast motion in these little birds and to avoid motion blurring is to use a fast shutter speed. That being said, image stabilization will indeed help a little bit in various situations. What I find more important than image stabilization, however, is to keep those shutter speeds in the range of 1/focal length or, preferably, even faster. If you keep the shutter speeds this fast, you can capture sharp images with or without image stabilization.
Turn off all the beeping sounds that your camera makes including the focus confirmation beep. These beeps may frighten and scare away some birds. It may take a bit of time to get used to shooting with no confirmation beeps, but this really is necessary when you are trying to get as close as possible to skittish birds.
Breath control is exceptionally important... slowly breath in... hold it... Very carefully depress the shutter release button... do not squeeze the button and inadvertently move or rotate the camera... just lightly press down evenly on the shutter release button... then release your breath.
Effective breath control will help in minimizing camera shake. Carefully depressing the shutter release button rather than squeezing the entire camera in your hand is an important part of this process. Learn the best way to hold your camera to minimize any possibility of introducing camera shake. Breath control is important for all types of photography but it is especially important when shooting longer focal lengths.
For most situations, I prefer to get the one shot I want rather than "spray and pray" at high frame rate speeds. Far too many people think that shooting at high speeds in a burst "spray and pray" mode is the key to getting the best shots. Generally speaking, it is not. There certainly are uses for high/fast burst frame rates but it is best to know when to capture the frame.
Using a "spray and pray" game plan is the key to is getting a lot of shots you will then need to delete. That being said, when tracking a bird in flight or a fast flurry of action, using a burst mode for short bursts definitely comes in handy. For birds in trees, birds paddling along on the water, and even for birds flying along in a straight line, I really do prefer to be patient and wait for the single shot. Practice to get your timing just right and you will find you have far more keepers.

The Set
Study your location (your set) just like you would in the studio. Figure out the quality of the light... direction of the light... then place yourself in the best location. For instance, do you really want to be shooting into the sun? Sometimes you might, but shooting into the sun is oftentimes very undesirable. Pay attention to the quality of the light as well as the direction of the light.
Pay attention to composition. Try to frame your birds without background clutter interfering with your subject. Keep the rule of thirds in mind. Be patient and wait for the composition and the pose you hope to capture. Try to capture some sort of action rather than a static scene. Move to a place and an angle which minimizes background clutter.
Know Your Equipment
Every camera has its strengths and weaknesses. Know both the strengths and weaknesses and find your camera's limitations. Know the features of your camera and how to most easily and quickly access those features. The same applies to your lenses. The better you know your equipment and its limitations, the better you will be able to capture beautiful images. When you go beyond the limits of your gear, your image quality deteriorates very quickly. Worse yet, when you push beyond the limits of your gear you will get frustrated and start making other mistakes only compounding your problems.
 Know Your Model
Know bird behavioral characteristics for the types of birds you will be shooting so you can more accurately predict your subject's behavior.
The Digital Darkroom
Capturing beautiful images does not end at depressing that shutter release button. You must also master "developing" these images in post-processing using many different techniques with the same names as the traditional darkroom... dodging, burning, split tone, duotone, hand painting, airbrushing, tinting, cross-processing, etc.
Post-processing is accomplished in the digital darkroom where you can crop to get the most pleasing composition. This is where you can minimize noise... add clarity... add selective sharpness... add tonal contrast... fine tune color balance... etc. This is where you transform a flat, two-dimensional image file into a three-dimensional photo with texture, color, light, shadow, tonal qualities, clarity, etc.
The traditional darkroom has been replaced by the digital darkroom. As good as cameras have gotten in the past decade or so, images still need post-processing to get the most out of your gear. My advice is to learn as much as possible about post-processing. Learn and practice!
Summation
To sum up these tips...
1. Use the right gear for the type of photography. Bird photography will require lenses with a 400-600mm equivalent field of view.

The Camera
This first tip is a no-brainer but worth mentioning anyway. A newer camera body will provide certain advantages over an older model. Additionally, some cameras are better than others for various types of photography.
The main reasons for a newer, better camera are for better resolution, better low light capabilities, faster processing speed and improved autofocus. The better your tools (and knowing how to effectively use those tools), the better your chances are at a better final product.
One of my own difficulties with this type of photography until very recently stemmed from struggling too long with a poor camera body. Since the first day I started using that particular camera body, I struggled to capture crisp images of distant objects. Even stationary distant objects such as mountains were always blurred a bit! I actually spent years trying to resolve the problem and working on technique all to no avail. It wasn't until I purchased a new camera body that I realized the problem was not me... the problem was that crappy Olympus E-620 dSLR body! Even though I learned a lot about digital photography, in general, while using this camera, I truly felt like crying when I realized that I had wasted perhaps thousands of hours over the course of years in trying to overcome this problem with clarity, focus and sharpness.
I had recently acquired an incredible Sony camera system which I have to say is, by far, the best camera I have ever used or even imagined. The first time I used this Sony camera, I immediately saw an improvement in my final product... amazing clarity and crispness... sharp photos (although, even when friends use this camera to shoot a quick photo of me, it is usually blurred... that isn't the camera's fault... it is the result of people not understanding how to hold a camera and how to shoot a photo while keeping the camera steady... so, no matter how good the camera, technique is very important)... beautiful tonal qualities... and ease of use (now that I knew all the ins and outs of exposure, light and photography while also having decades of experience with widely varying cameras). To this day, this is my absolute favorite camera system for portraits/people photography and even landscape photography. It simply is leaps-and-bounds better than anything I have ever used before. Unfortunately, this is not the camera system to use for long telephoto photography.
If this camera system had the appropriate lenses available to use for wildlife and bird photography, I'm sure I would be using it for this purpose as well. Unfortunately, this is not the case which leaves me evaluating other options for wildlife and bird photography.
(EDIT: In late 2016, I purchased a few super-telephoto lenses to adapt for use on my Sony camera. These purchases (used lenses) vastly improved my photography and has allowed me to pair great lenses with a great camera body. Within a very short time, Sony also started producing high quality telephoto lenses which are definitely great tools for wildlife and sports shooting. Sony is a very full system today with a great selection of lenses as well as class-leading auto-focus.)
At this point, I know enough about photography and have refined my technique enough that I understand that I need to find appropriate photography gear for all my long telephoto needs. That Olympus E-620 was the weak link in my photographic process and that weak link was frustratingly limiting. That weak link is now gone!
The fact is, very few people are set up properly for long telephoto photography. Technique is exceptionally important... understanding and knowledge of photography principles is exceptionally important... and, having the right gear is also exceptionally important for this very specialized type of photography.
In order to get the "right gear", there are a few directions you could go here:
a) If you already own a camera body which provides you with good, sharp, crisp results, with acceptable autofocus capabilities, you can just buy a more appropriate long lens in the 400-600mm field of view range. Depending upon your choice of lens, this could cost anywhere from $200 to $35,000+! Realistically speaking, for acceptable quality (my personal standards) and effective focal length, the prices really begin around the $800 mark so plan on spending between $800-1500 on a new lens or a bit less for a used lens.
b) If you know you need to replace your camera body because it simply is not up to this detailed, demanding and fast-moving task, then I recommend looking at a dedicated system strictly for long telephoto. One option is to first find a good used long telephoto lens with high ratings (search lens reviews online for the long lenses you see for sale) and then find a good used camera body with the same mount as the lens. The newer the camera body model, the better. You can then use this combo strictly for your long telephoto needs.
c) You can purchase a complete new camera system which would be more appropriate for longer focal lengths. Personally, if you decide to go with this option, at an absolutely minimum, I would recommend the Micro Four Thirds camera system. This system is incredibly small, lightweight, provides fast autofocus, and has some long lenses which reach into the 400-600mm equivalent field of view range. Lenses with this sort of focal range are necessary for this type of photography.
 |
| Panasonic Lumix DMS-FZ1000 |
Bridge cameras are like compact cameras in that they have a quality lens with a good focal range permanently affixed to it. One advantage here is that because of the long lens affixed permanently to the camera, there is no messing around with different lenses, no need to learn about the market of lens choices, and no need to deal with dust and dirt getting into your camera body every time you change lenses. Where bridge cameras differ from lower end compact cameras (and virtually useless cellphones) is that you, the photographer, have full control of your camera with manually adjustable settings while still retaining some automatic features, if desired.
If this sounds like a more desirable option, then I highly recommend the Panasonic FZ1000 (Panasonic Lumix DMC-FZ1000 website... or the newer FZ2000... or the Sony RX10 III). This beautiful little camera has an impressive sensor that is larger than what is found in most superzoom cameras. This relatively large sensor (1", which is large for a superzoom bridge camera) camera has proven itself as a sure winner. (Here is an example photo album of birds shot with this camera.)
Note: Since I am providing some advice here, I feel I must add this... I do not recommend any of the superzoom cameras with tiny sensors (smaller than 1")... My opinion is that those cameras with tiny sensors should be avoided at all cost. As of this writing, I can only recommend the Panasonic FZ1000 or the newer FZ2000 or the Sony RX10 III in the bridge camera category... and I highly recommend one of these cameras for anyone looking for a good camera with a permanently affixed lens whether shooting wildlife or not. (If you choose this camera option, you can skip over the "Lenses" section below.)
Camera Features
When looking for a camera to use for wildlife photography, features to consider are sensor size, resolution, low light capabilities and autofocus capabilities to include the effectiveness of these autofocus capabilities.
 |
| I use cameras with a large full-frame sensor as well as cameras with the smaller APS-C and four-thirds sensors. For wildlife and bird photography, four-thirds sensors provide a happy medium. By comparison, cellphone sensors are smaller than shown on this diagram. |
Generally speaking, larger sensors produce better tonal qualities, better dynamic range, more clarity and help in separating your subject from your background. For the best image quality, get the largest sensor you can afford (to include lenses designed specifically for that sensor size because lenses always end up being the biggest cost factor... the bigger the lens, the higher the cost... the better the lens, the higher the cost).
Now, let's talk about megapixel counts. This is the number of pixels on your particular sensor. Each photo is made up of tiny dot/pixels of light. The advantage to having more pixels on your sensor is it gives you more pixels to play with when it comes to cropping your images. Conversely, having too many pixels squeezed onto a tiny sensor may actually degrade image quality, not improve image quality. There is a happy middle ground depending upon where technology is at any moment in time. Again, generally speaking, sensor size should be considered first and then you might want to take a look at the number of megapixels packed into that sensor.
Assuming you are using a camera with a good sensor, increased resolution (megapixels) means you can crop farther into your photos. You must really be careful with the cropping, however, because this really degrades image quality quickly if you crop too aggressively. I see this problem far too often in people sharing all sorts of photos on Facebook but especially bird and wildlife photos... the over-cropped photo becomes very pixelated, washed out, noisy, hazy, and generally looks lousy because it was cropped far too drastically. All that being said, the more good pixels you have, the more you can crop, to a point.
Even though you will probably be shooting your wildlife photos in the daytime, the low light capabilities of your camera are extremely important. Even in good light (bright sunlight), I find myself shooting in the ISO 200 to ISO 400 range in order to keep my shutter speed fast enough to capture crisp photos. Needless to say, in less-than-ideal light, the ISO must be bumped considerably higher in order to keep the shutter speed fast enough for these flittering, fluttering birds.
Some cameras produce very grainy, fuzzy, noisy images above ISO 400... some cameras have no problems with this type of image degradation until above ISO 1600 or 3200. Some newer cameras with larger sensors can capture beautiful, clean images up into the ISO 6400 range. The better your camera is with low light, the easier it will be to keep those shutter speeds fast enough (which is needed for crisp photos). Again, generally speaking, newer cameras are better at this than older cameras.
The next advantage of a newer camera body is gaining a better, more efficient autofocus system. Newer cameras typically sport faster autofocus systems covering the entire frame with more accurate autofocus tracking abilities. Wildlife photography is about waiting for the right moment. When that moment arrives, however, there is a flurry of activity within mere seconds so you need to have the ability to focus quickly and track your subject effectively. Newer cameras are much better at this than older cameras and some cameras are better than others.
You must find a camera body which works best for you and your budget based upon the above information as a guide.
Lenses
Lens selection is exceptionally important. I have found that you need to be able to reach into the 400-600mm range (full frame field of view equivalent) for wildlife photography. This means that if you are using an APS-C size sensor which has a 1.5x focal length crop factor (ie, entry-level or mid-level Canon, Nikon, Fuji, Sony, Pentax), then you would need a lens with a focal length in the 300-400mm range which would give you a full frame field of view of 450-600mm (300mm x 1.5 = 450mm and 400mm x 1.5 = 600mm).
A happy medium between large sensors and small compact camera sensors is the Micro Four Thirds format which uses four-thirds size sensors which have a 2x focal length crop factor. This 2x focal length crop factor is great for getting even longer focal lengths while still retaining a fairly high level of image quality from the medium sized four-thirds sensor. So, Micro Four Thirds lenses with a focal length of only 300mm will actually give me a field of view equivalent of 600mm (300mm x 2 = 600mm)... and yet this camera and lens combo is relatively small and relatively lightweight.
Get the best lens you can afford. The better the quality of the lens, the better your images will be. A high quality lens will provide clarity, sharpness, nice micro contrast, with little-to-no distortion nor aberrations. Quite simply, high quality lenses cost more money. Would you prefer to be looking through scratched, hazy sunglasses or crystal clear, sharp sunglasses? Seek the best glass you can afford.
A cheaply made, low quality lens will have all sort of chromatic aberrations, it will lack contrast, and will be lacking clarity and sharpness. You might as well be looking through the bottom of a Coke bottle! Check online lens review websites to research the quality of specific lenses before you purchase a lens. Compare reviews and compare lens test results.
The "faster" lenses with larger apertures (which makes for larger and much more expensive lenses) give you two advantages. First, you can shoot at higher shutter speeds when you open up that aperture... and second, you can more easily separate your subject from a blurred background to help minimize distracting background clutter. These features come at a premium price, however, and these faster lenses are extremely large... in many cases, too large to keep steady while shooting without a tripod or monopod.
To sum up... The best lenses have the ability to capture sharper, crisper images with beautiful tonal qualities and micro contrast while minimizing distortion and chromatic aberrations. For the most part, you get what you pay for when it comes to lenses.

Technique
Keep your shutter speeds fast while still getting the correct exposure. You'll definitely want a properly exposed image without overexposing the highlights. If you blow out the highlights, you will see only empty white space where highlight detail should be (ie, if you overexpose a white bird, you will lose all detail in the white and you will have no feather detail or depth, or you could overexpose a sky leaving you with a flat white sky instead of a detailed sky).
In order to keep images crisp, once you understand light and exposure, the general rule of thumb is to shoot a shutter speed that is 1/focal length. So, if you are shooting a longer telephoto lens at a 600mm equivalent field of view (which is the length I shoot quite often), then you need a shutter speed of at least 1/600th second. I find that I get sharper results at closer to double that speed. At 600mm, I actually prefer to shoot in the 1/1000 to 1/1250th second range but will drop the shutter speed down to 1/600th second in some circumstances when I can rest the camera and lens on something stationary.
Now, let's talk about lens stabilization... or sometimes referred to as IS (image stabilization). This feature is great for minimizing camera shake. When the shutter speeds are slow it is more critical to keep that camera rock steady. Good IS can help to minimize the effects of camera shake at long focal lengths. Unfortunately, when shooting birds, the biggest problem which causes blurring is due to the birds moving so quickly and IS will do absolutely nothing to help with this problem. IS only helps minimize camera shake due to poor handling by the photographer. If your subject moves while using a slower shutter speed, you get motion blurring regardless of IS or not.
The way to counter the fast motion in these little birds and to avoid motion blurring is to use a fast shutter speed. That being said, image stabilization will indeed help a little bit in various situations. What I find more important than image stabilization, however, is to keep those shutter speeds in the range of 1/focal length or, preferably, even faster. If you keep the shutter speeds this fast, you can capture sharp images with or without image stabilization.
Turn off all the beeping sounds that your camera makes including the focus confirmation beep. These beeps may frighten and scare away some birds. It may take a bit of time to get used to shooting with no confirmation beeps, but this really is necessary when you are trying to get as close as possible to skittish birds.
Breath control is exceptionally important... slowly breath in... hold it... Very carefully depress the shutter release button... do not squeeze the button and inadvertently move or rotate the camera... just lightly press down evenly on the shutter release button... then release your breath.
Effective breath control will help in minimizing camera shake. Carefully depressing the shutter release button rather than squeezing the entire camera in your hand is an important part of this process. Learn the best way to hold your camera to minimize any possibility of introducing camera shake. Breath control is important for all types of photography but it is especially important when shooting longer focal lengths.
For most situations, I prefer to get the one shot I want rather than "spray and pray" at high frame rate speeds. Far too many people think that shooting at high speeds in a burst "spray and pray" mode is the key to getting the best shots. Generally speaking, it is not. There certainly are uses for high/fast burst frame rates but it is best to know when to capture the frame.
Using a "spray and pray" game plan is the key to is getting a lot of shots you will then need to delete. That being said, when tracking a bird in flight or a fast flurry of action, using a burst mode for short bursts definitely comes in handy. For birds in trees, birds paddling along on the water, and even for birds flying along in a straight line, I really do prefer to be patient and wait for the single shot. Practice to get your timing just right and you will find you have far more keepers.
The Set
Study your location (your set) just like you would in the studio. Figure out the quality of the light... direction of the light... then place yourself in the best location. For instance, do you really want to be shooting into the sun? Sometimes you might, but shooting into the sun is oftentimes very undesirable. Pay attention to the quality of the light as well as the direction of the light.
Pay attention to composition. Try to frame your birds without background clutter interfering with your subject. Keep the rule of thirds in mind. Be patient and wait for the composition and the pose you hope to capture. Try to capture some sort of action rather than a static scene. Move to a place and an angle which minimizes background clutter.
Get as close as you can to these little birds. Approach very slowly, never walking directly at the birds but moving in a zig-zag pattern. Do not look directly at the birds as you approach. When you are getting into position, you will likely scare away all sorts of wildlife nearby. Just get comfortable, sit still, and wait. The birds will return within minutes.
If it suits the location, build yourself a blind. This can be a little tent draped in camo netting, an open window, or some sort of ghillie suit... anything to hide yourself and keep you from looking like a threatening human. You want to be as invisible as possible and as quiet as possible. Birds pick up on motion and noise so stay still, stay quiet and be patient!
Know Your Equipment
Every camera has its strengths and weaknesses. Know both the strengths and weaknesses and find your camera's limitations. Know the features of your camera and how to most easily and quickly access those features. The same applies to your lenses. The better you know your equipment and its limitations, the better you will be able to capture beautiful images. When you go beyond the limits of your gear, your image quality deteriorates very quickly. Worse yet, when you push beyond the limits of your gear you will get frustrated and start making other mistakes only compounding your problems.

Know bird behavioral characteristics for the types of birds you will be shooting so you can more accurately predict your subject's behavior.
The Digital Darkroom
Capturing beautiful images does not end at depressing that shutter release button. You must also master "developing" these images in post-processing using many different techniques with the same names as the traditional darkroom... dodging, burning, split tone, duotone, hand painting, airbrushing, tinting, cross-processing, etc.
Post-processing is accomplished in the digital darkroom where you can crop to get the most pleasing composition. This is where you can minimize noise... add clarity... add selective sharpness... add tonal contrast... fine tune color balance... etc. This is where you transform a flat, two-dimensional image file into a three-dimensional photo with texture, color, light, shadow, tonal qualities, clarity, etc.
The traditional darkroom has been replaced by the digital darkroom. As good as cameras have gotten in the past decade or so, images still need post-processing to get the most out of your gear. My advice is to learn as much as possible about post-processing. Learn and practice!
Summation
 |
| A lens with a 300mm equivalent field of view is just not long enough in most situations. |
1. Use the right gear for the type of photography. Bird photography will require lenses with a 400-600mm equivalent field of view.
2. Know your gear's strengths and weaknesses. Your camera is a tool... learn how to most effectively use this tool.
3. Keep your shutter speed fast... 1/equivalent focal length or faster. Birds are fast moving, flittery little creatures so you must keep that shutter speed much faster than you would think to get sharp results.
4. Be religious about proper technique. Steady... breath control... carefully depress shutter release button.
5. Get as close as possible... be quiet... be still... be patient. Even with long telephoto lenses, you will need to be as close as possible to your subjects.
6. Pay attention to the quality of the light, the direction of the light, and problematic backgrounds. Position yourself so the light is coming from a pleasing angle while also providing opportunities for good compositions.
7. Shoot in your camera's RAW file format to avoid the compression artifacts of jpeg files. RAW files will give you some extra detail, extra dynamic range and smoother tonal qualities in many circumstances. Use this to your advantage.
8. Learn how to properly "develop" your images in post-processing.


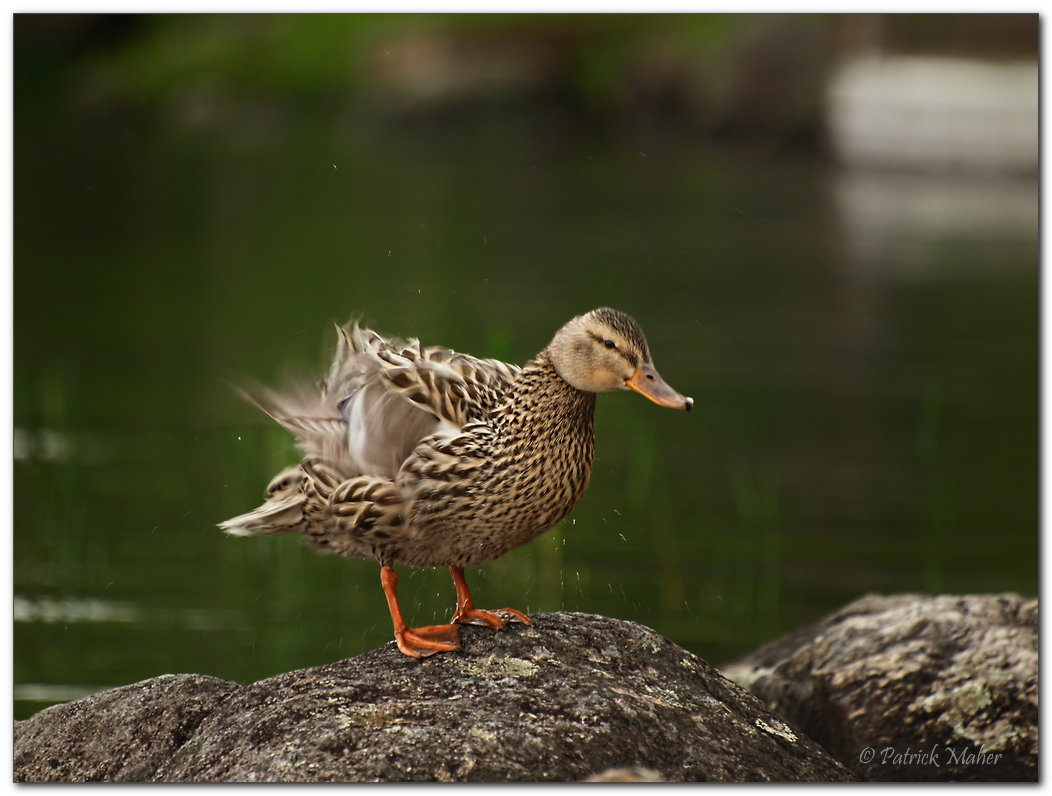
Now, get out there and capture some beautiful photographs! I know I plan to do just that. I hope to be sharing my results here in the coming months. Here are some additional sample bird images...
Comments
Post a Comment